How To Make A Procreate Gradient – Easy Step-by-Step Guide
The knowledge of how to make a Procreate gradient is a great way to give your designs more depth and dimension. They’re also great for making beautiful backgrounds for websites and social media posts. Gradients are a great way to make your visuals stand out. This tutorial will show you how to make a gradient with Procreate.
A Procreate gradient effect can be achieved in various ways, just like any other effect. This article will show you some of the most effective methods. There are a variety of Procreate gradient styles to choose from, and we’ll go over them all. So let’s get started!
How To Make A Linear Gradient In Procreate
Procreate makes it easy to create a simple linear gradient. It only takes a few steps to complete. Let’s take a look at how to make a gradient in Procreate:
Step 1:
Open your project and navigate to the location where you want your gradient to appear.
Step 2:
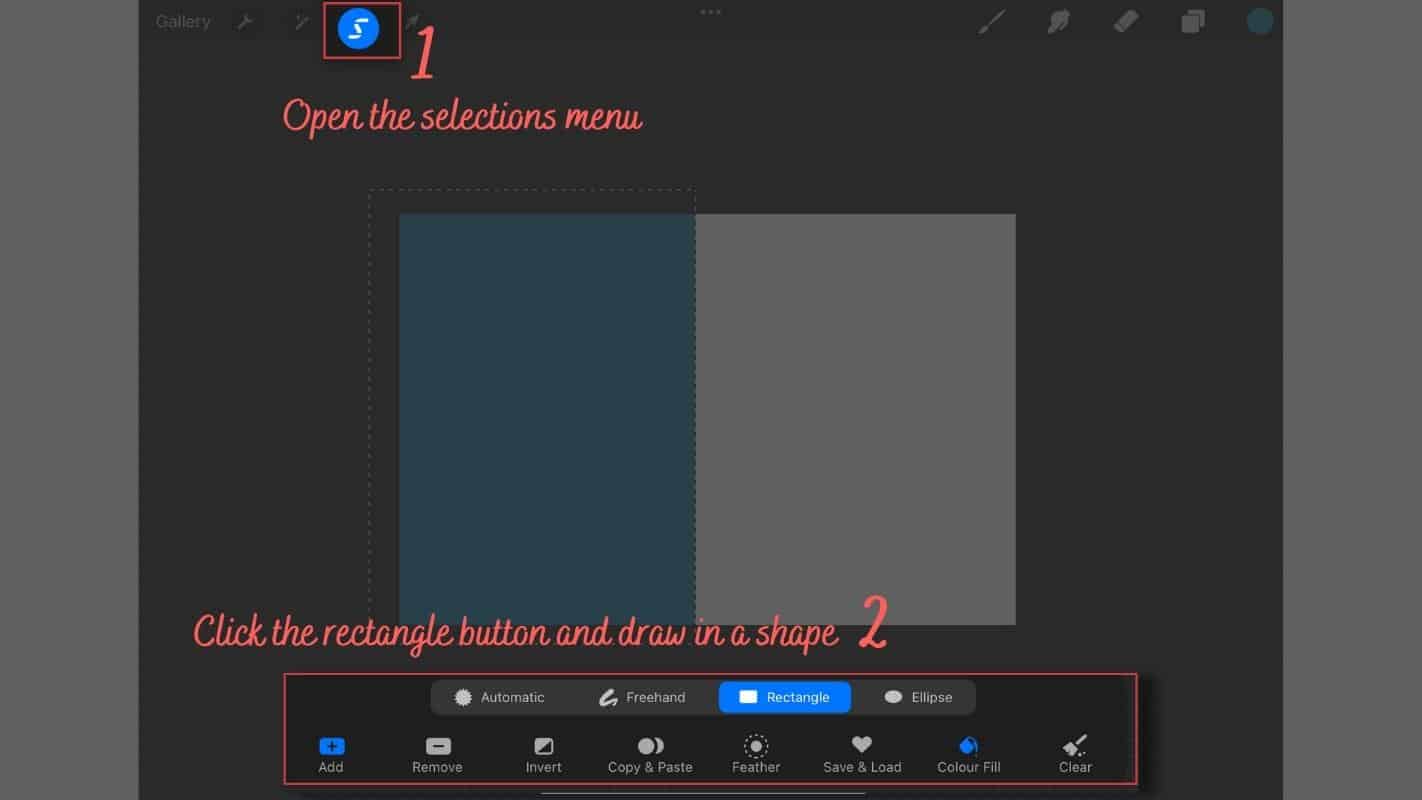
Make a rectangle shape. Click the “S” in the top right bar. This opens the selections menu. Then click on the rectangle button and draw a figure across the entire left side of the canvas.
Step 3:
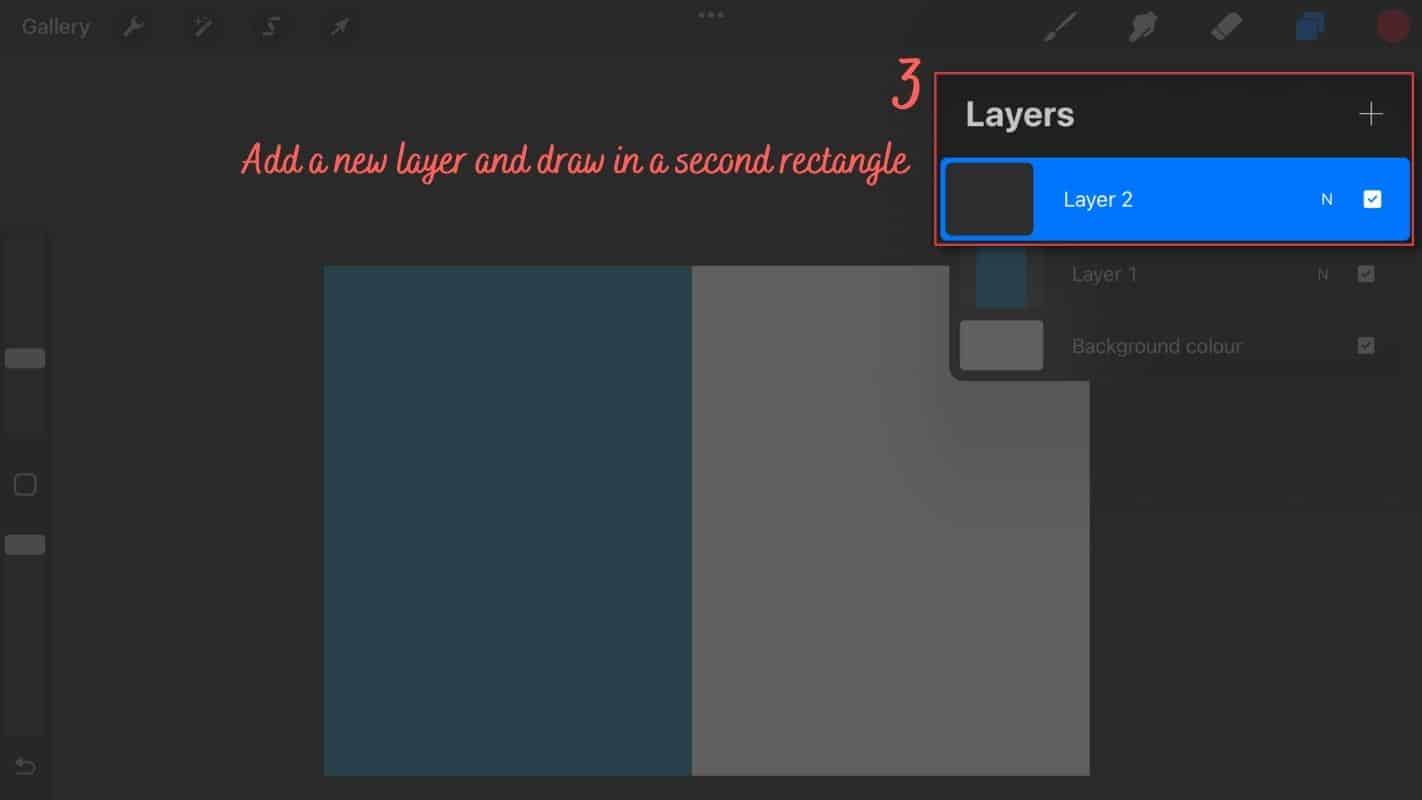
Make a new layer and draw a second rectangle on top of it. Change the color to something you like. Then, on the opposite side of the canvas, draw a rectangle. You should now have two colors covering the entire canvas, one on the left and one on the right.
Step 4:
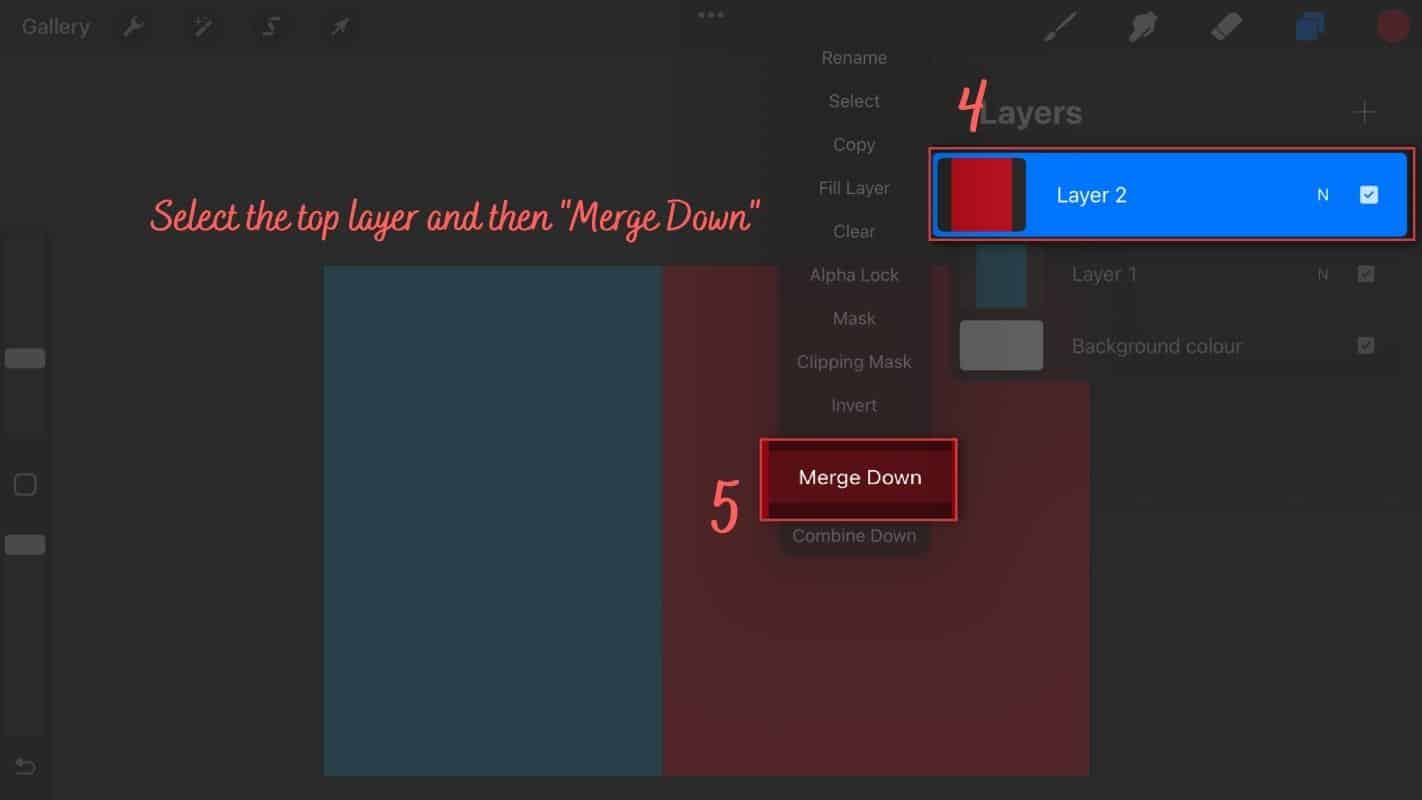
Combine the two layers. On the top right, open the layers panel. Click on the top layer, then select “Merge Down”. You now have a single layer with the two colors combined.
Step 5:
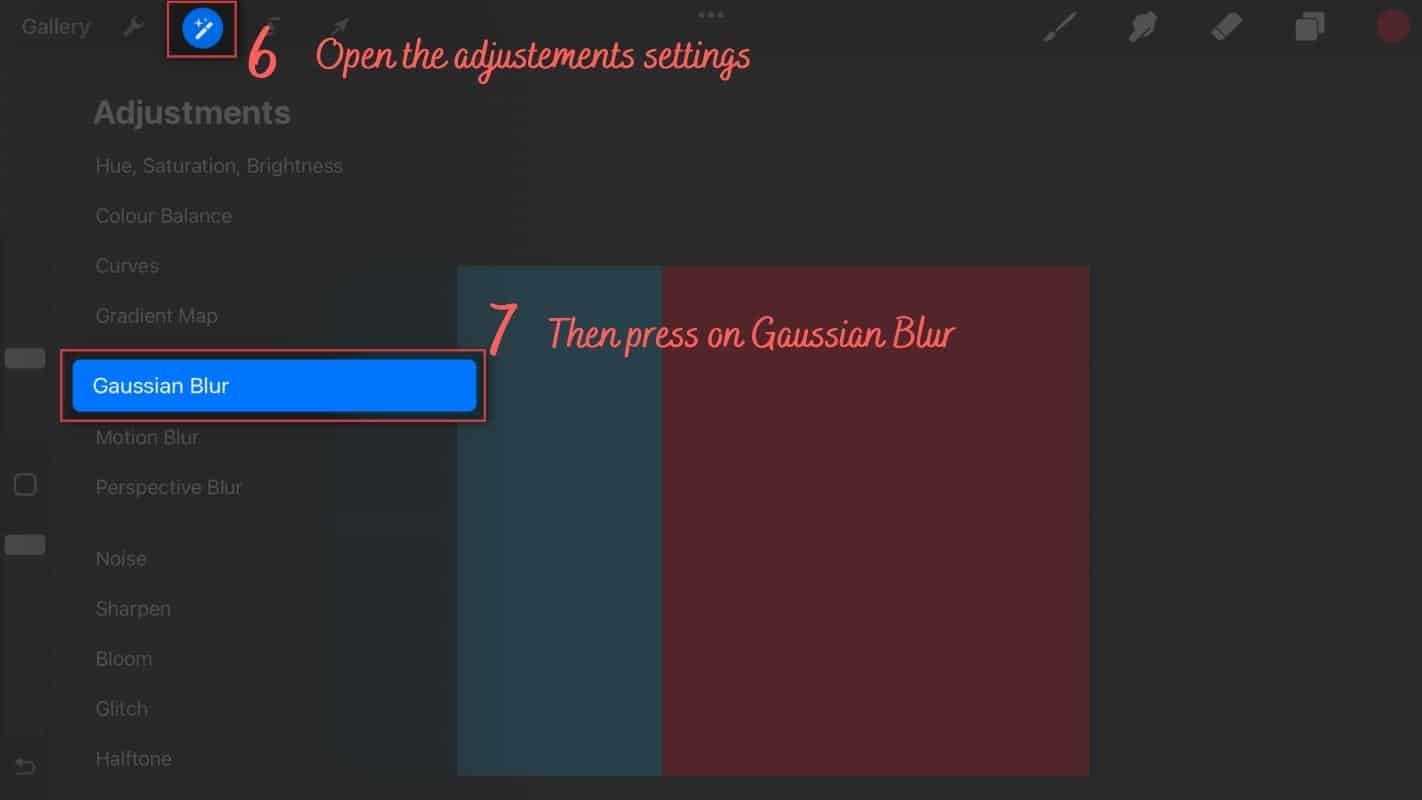
Apply a blur to the layer. The magic pencil icon opens the Adjustments settings. Then select “Gaussian Blur.” To change the intensity of the gaussian blur, swipe from left to right. Click the magic pencil again to close the window when you’re finished.
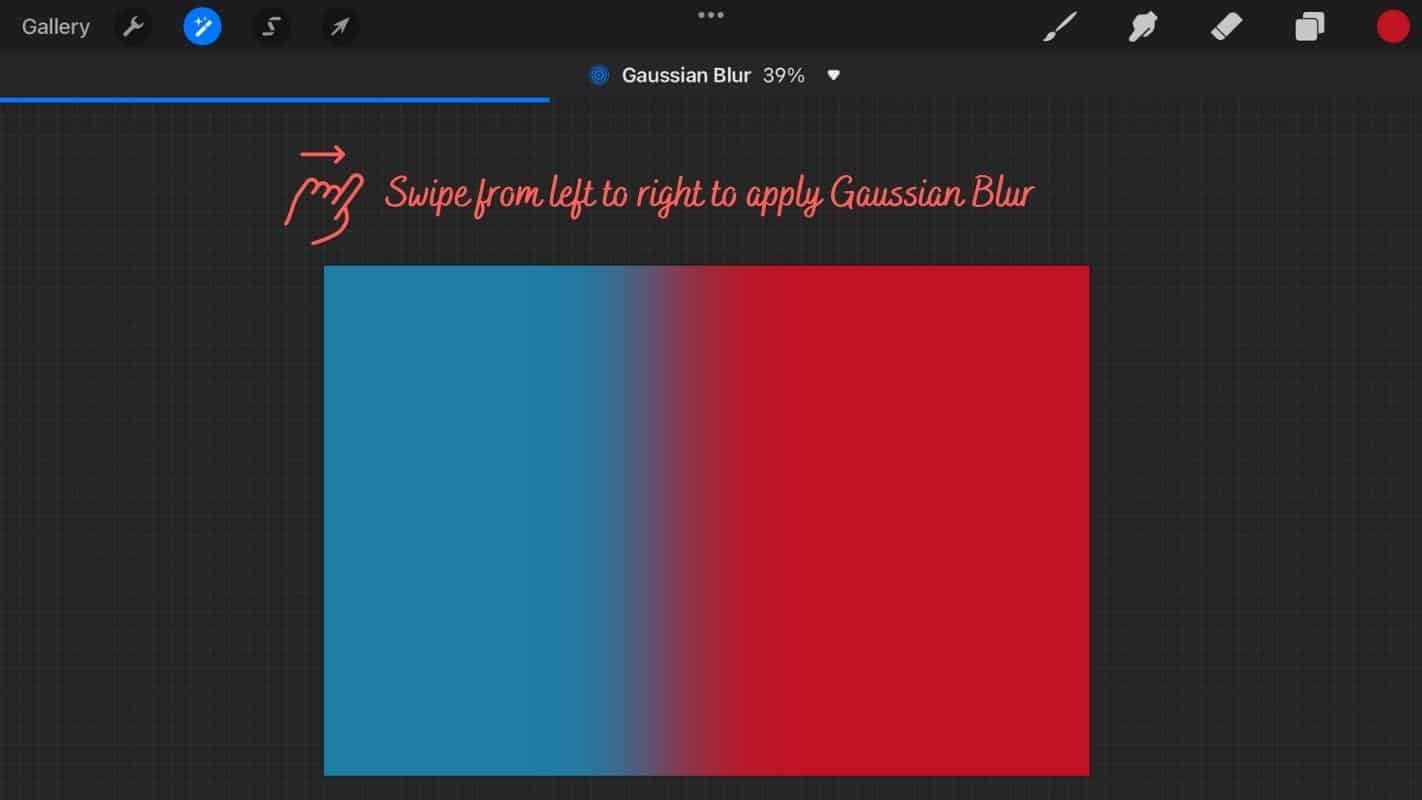
You now have a linear gradient. Well done!
How To Make A Radial Gradient In Procreate
The steps for creating a radial gradient are similar to those for creating a linear gradient. However, we use the ellipse shape form rather than the rectangle shape. So, let’s begin with this Procreate gradient.
Step 1:
Open your project to the location where you want your radial gradient to appear.
Step 2:
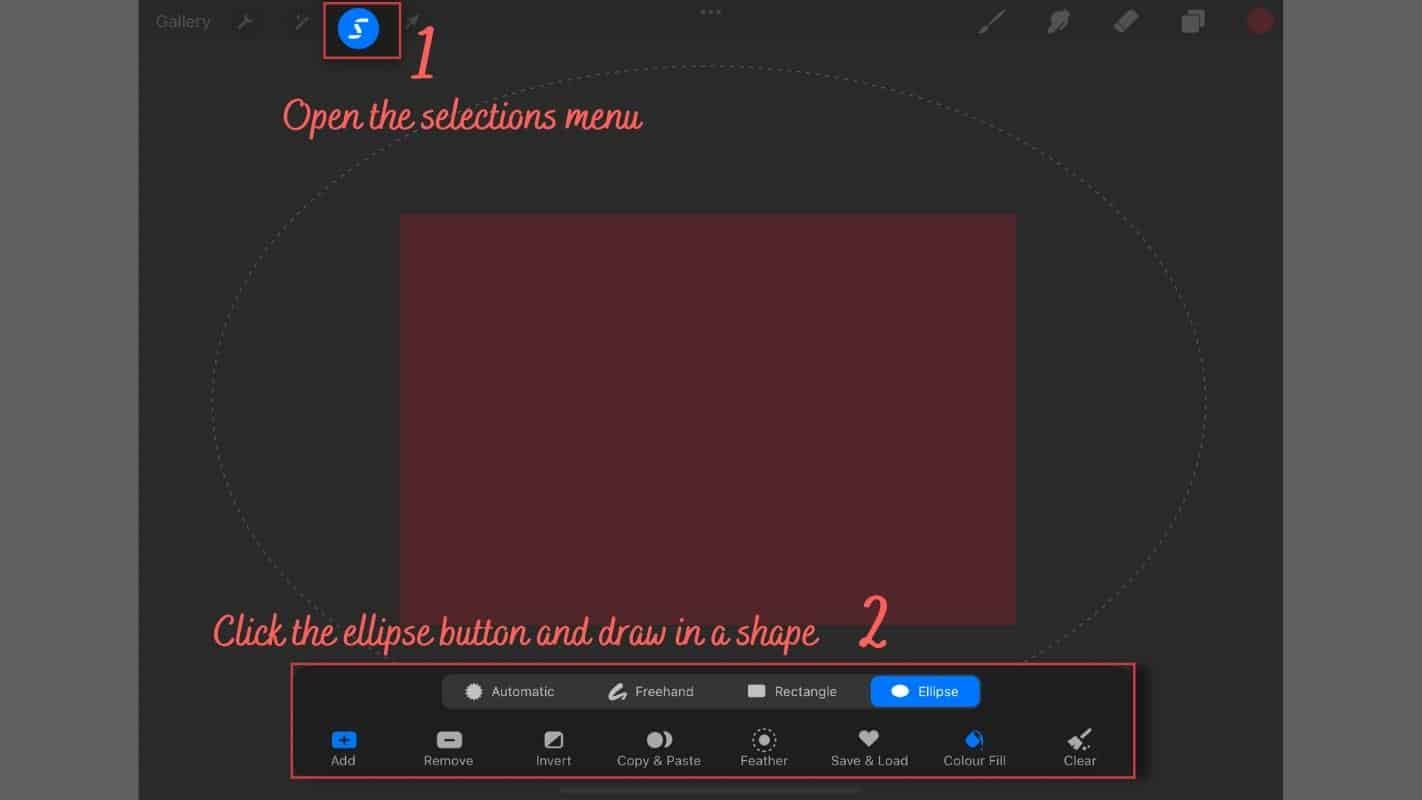
Make an ellipse shape. Click the “S” in the top right bar. This opens the selections menu. Then click on the ellipse button and draw a shape across the entire left side of the canvas.
Step 3:
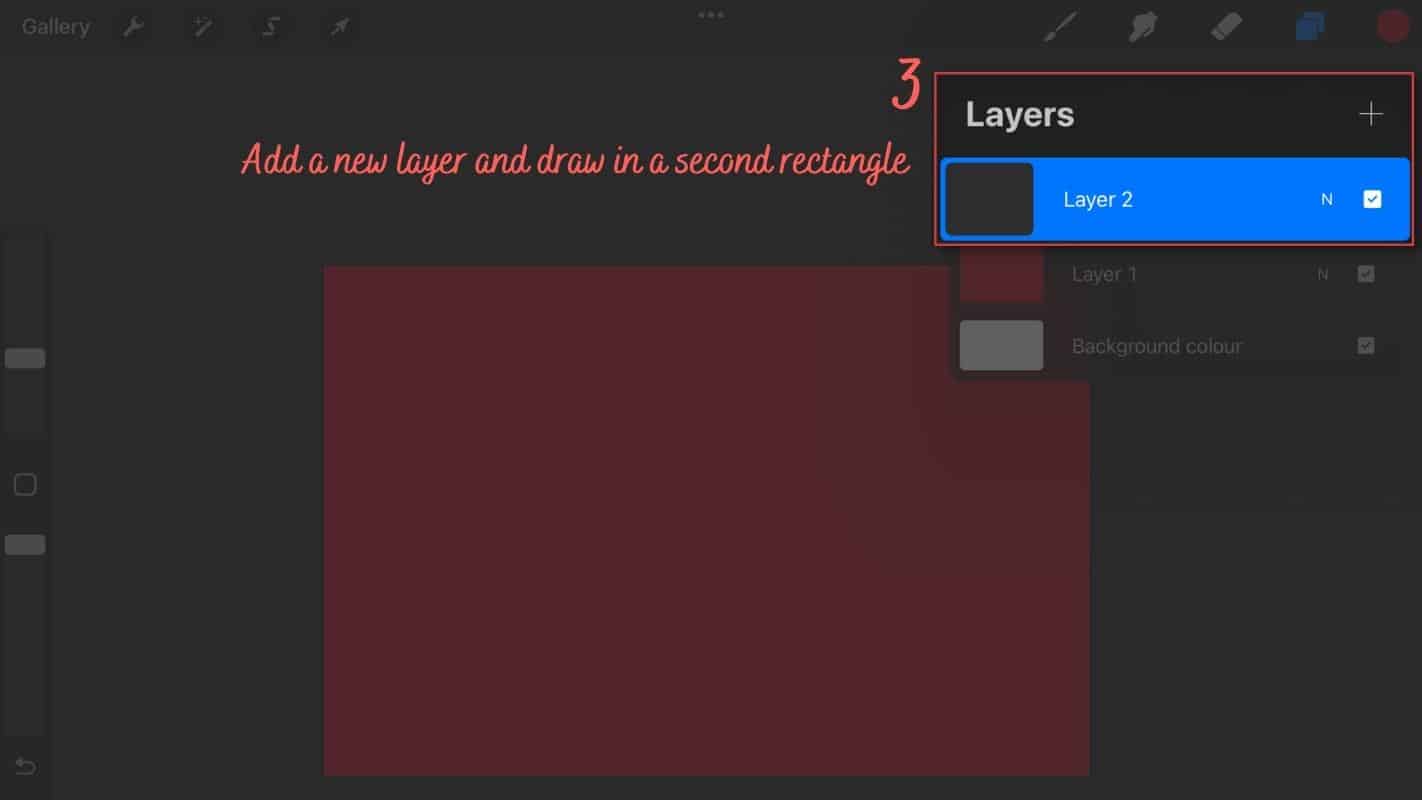
Make a new layer and draw a new ellipse on it. This time, the ellipse is a little smaller than in step 2. Give them a different color. Create new layers, add a new ellipse, or go to step 4.
Step 4:
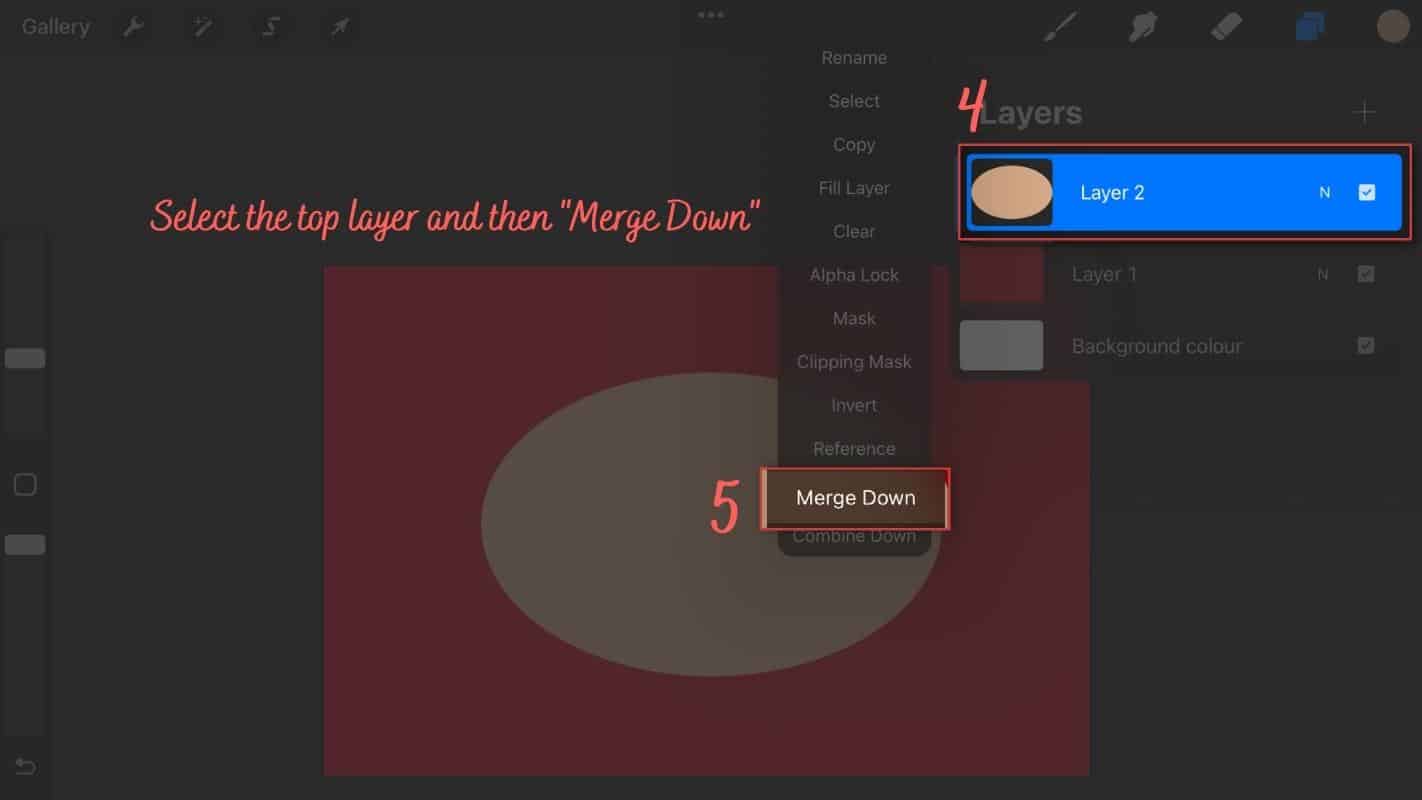
Merge your layers. On the top right, open the layers panel. Click on the top layer, then select “Merge Down”. You now have a single layer with all the colors combined.
Step 5:
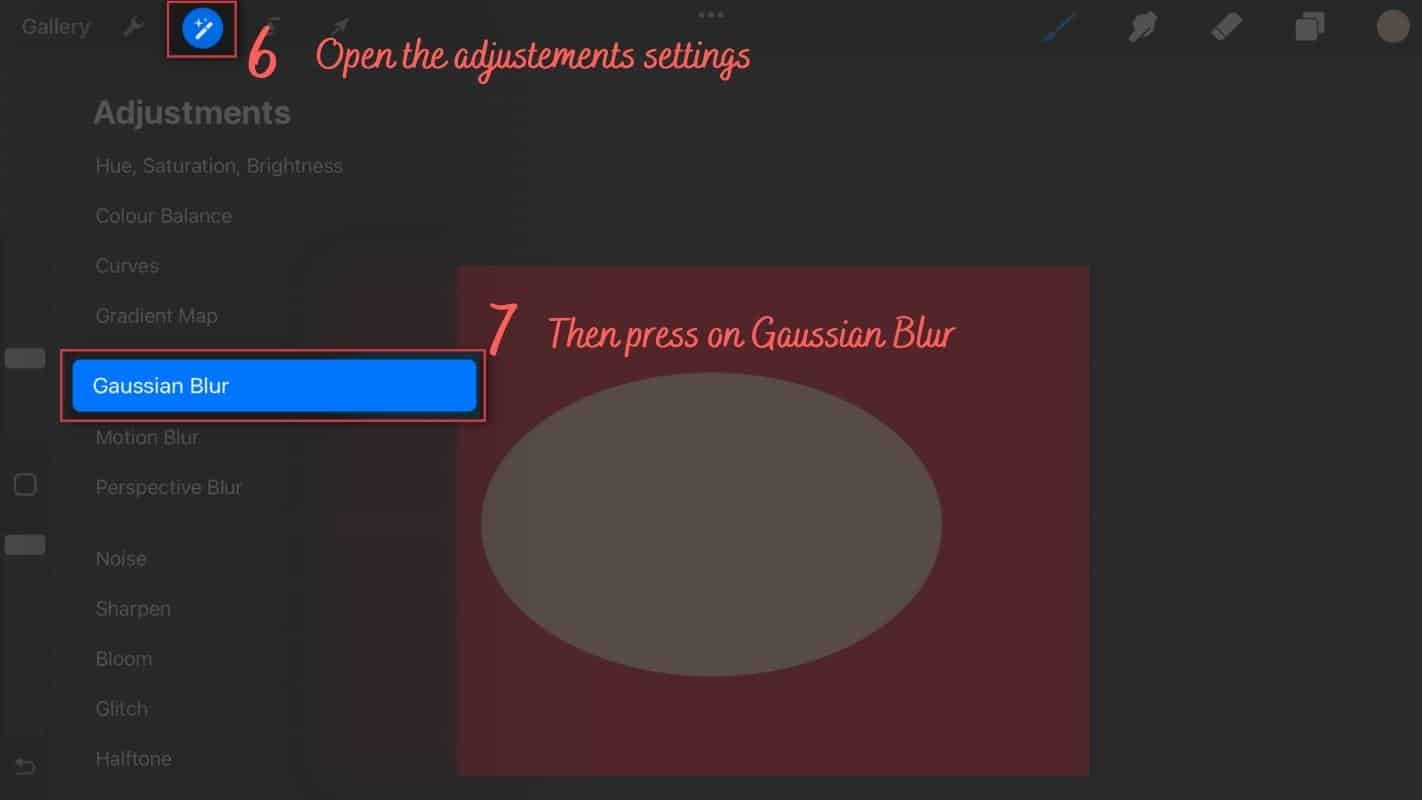
Apply a blur to the layer. The magic pencil icon opens the Adjustments settings. Then select “Gaussian Blur.” To change the intensity of the gaussian blur, swipe from left to right. Click the magic pencil again to close the window when you’re finished.
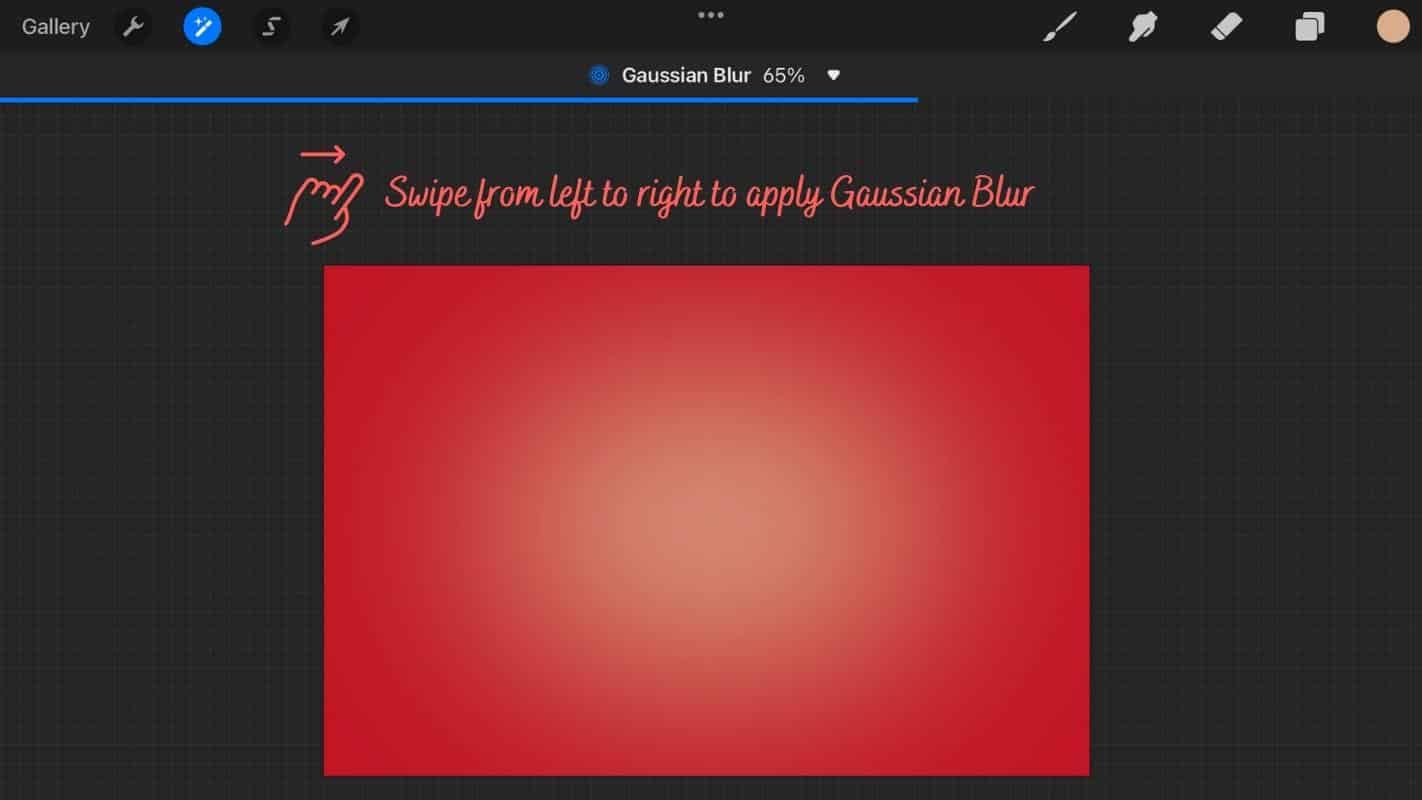
You now have a radial gradient. Congratulations!
How To Make A Gradient In Procreate With Brushes
Brushes can also be used to create gradients. These can be used for both linear and radial gradients in Procreate. They are straightforward to make. Let’s see how that turns out. The cool thing about this method is that you don’t have to do it on multiple layers. Without the need to merge layers, one layer suffices.
Step 1:
Open your project and navigate to the location where you want your gradient to appear.
Step 2:
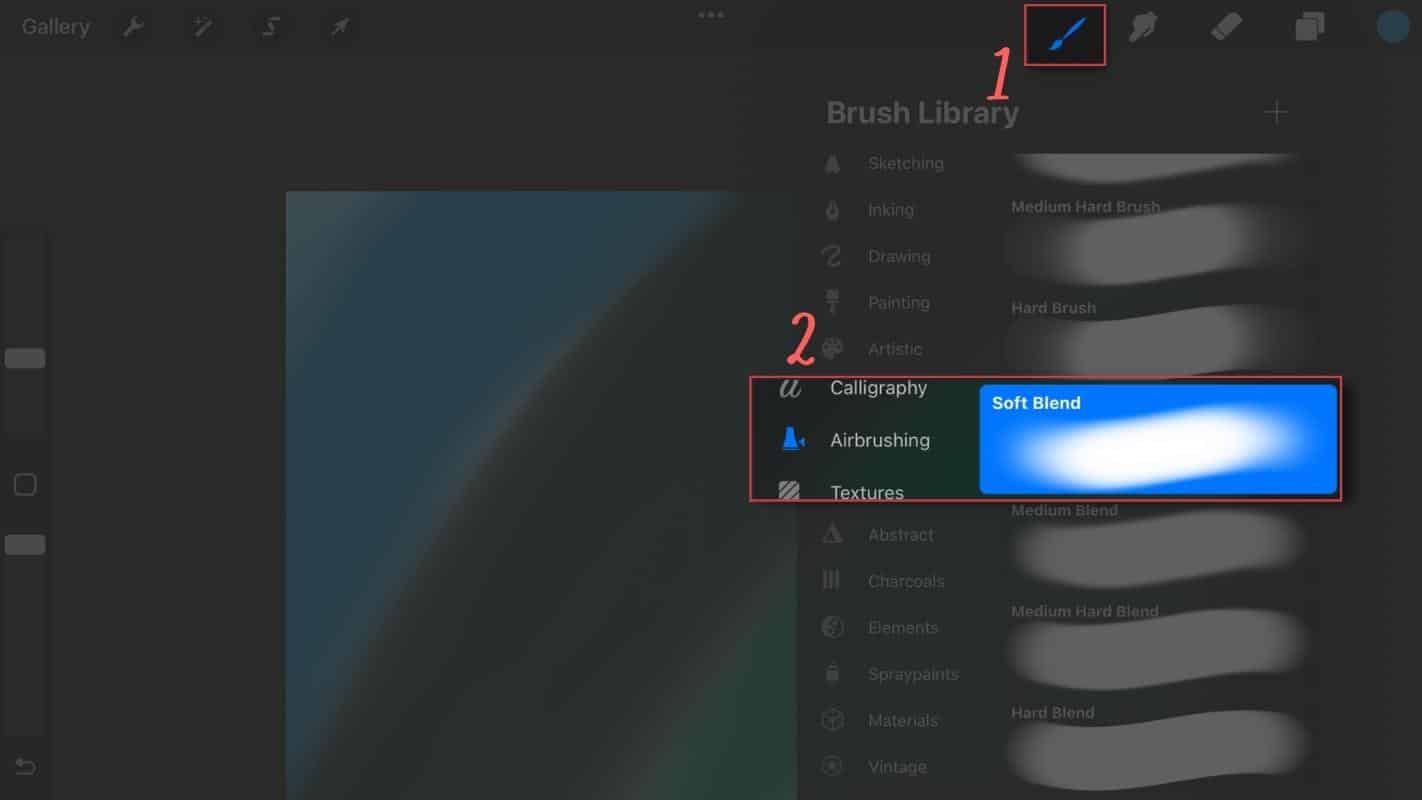
Choose a fine brush with soft tips. We’ll use an Airbrushing Brush and the Soft Blend in this case.
Step 3:
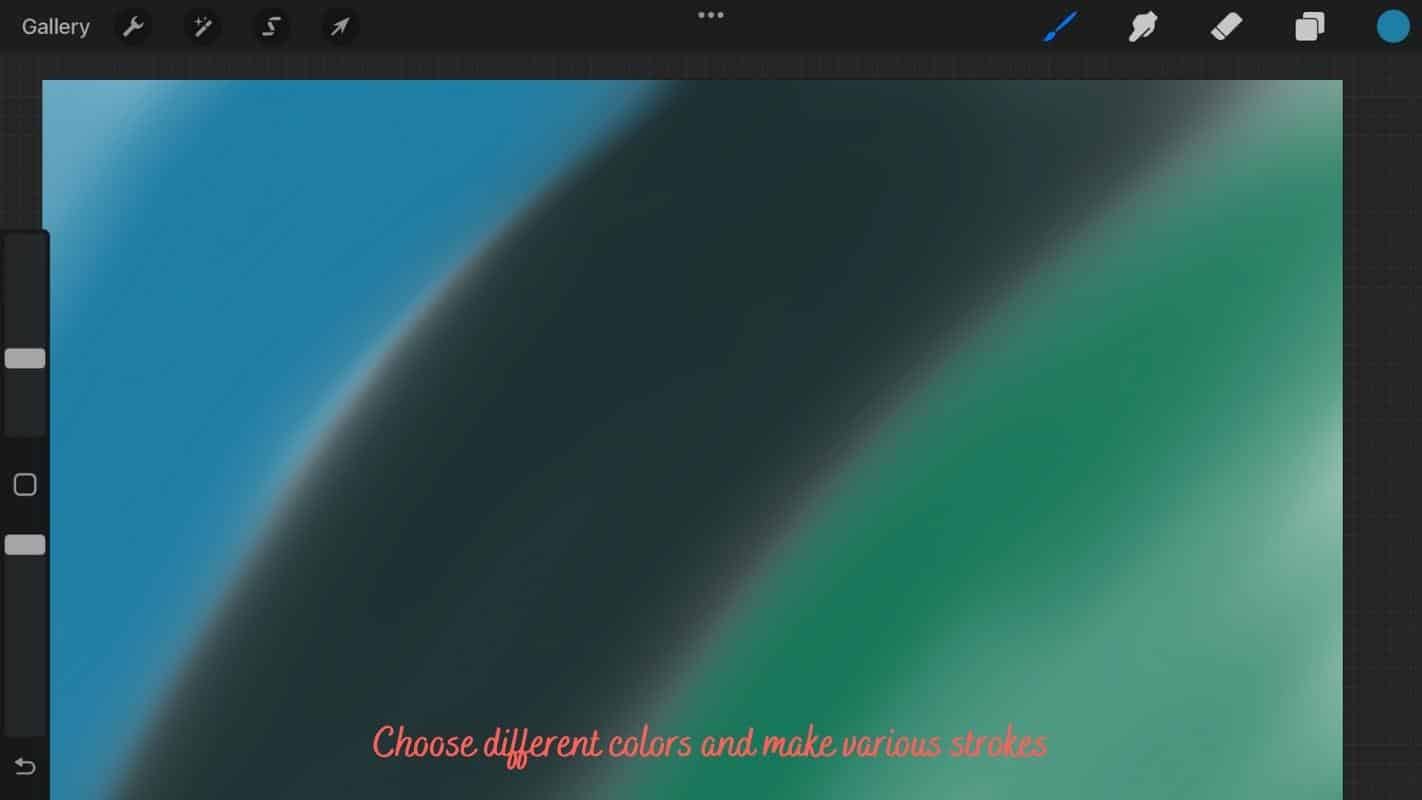
Using the brush, make various strokes. To create a nice gradient, choose different colors. Don’t be concerned if your transitions aren’t going well.
Step 4:
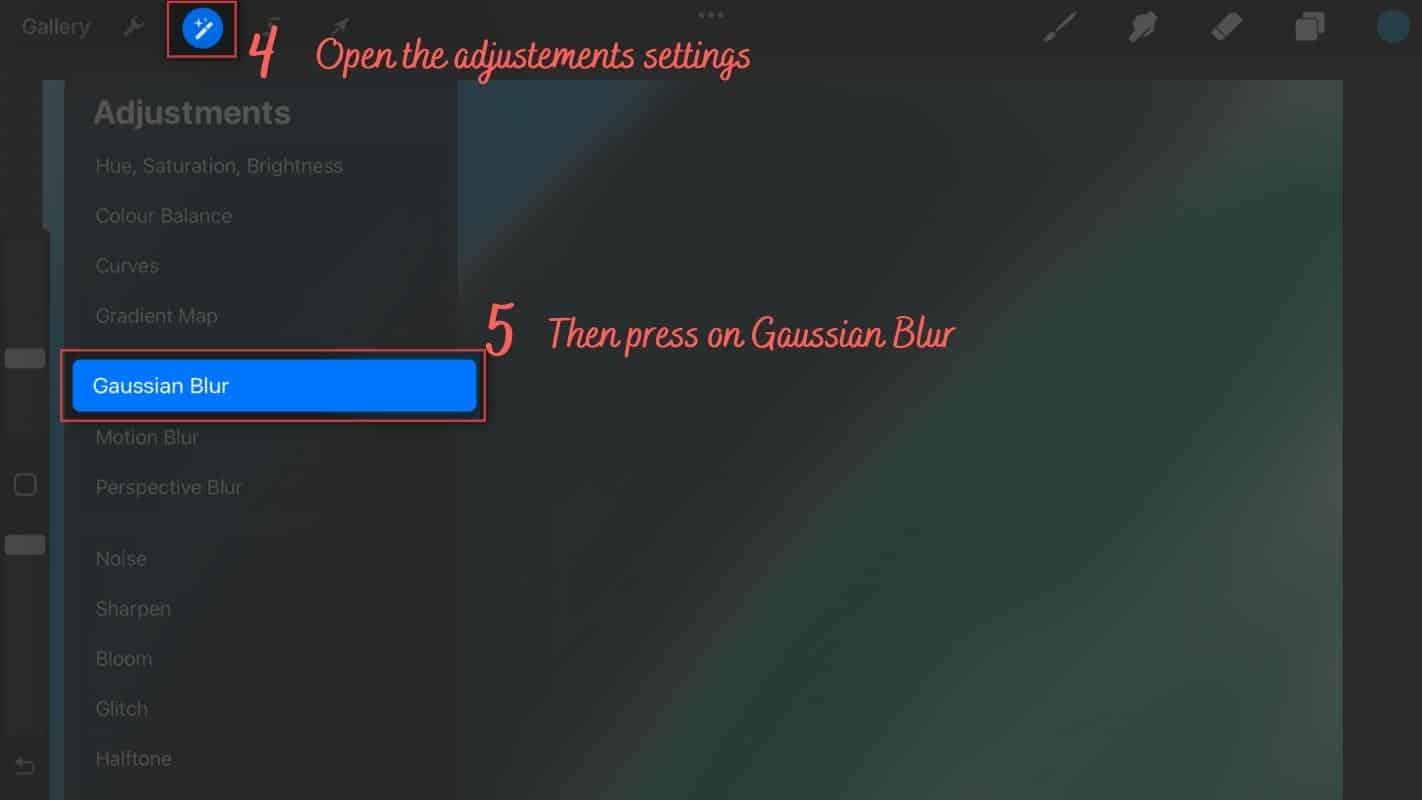
Add some blur to the layer after you’ve filled the canvas with Airbrush. The magic pencil icon opens the Adjustments settings. Then select “Gaussian Blur.” To change the intensity of the gaussian blur, swipe from left to right. Click the magic pencil again to close the window when you’re finished.
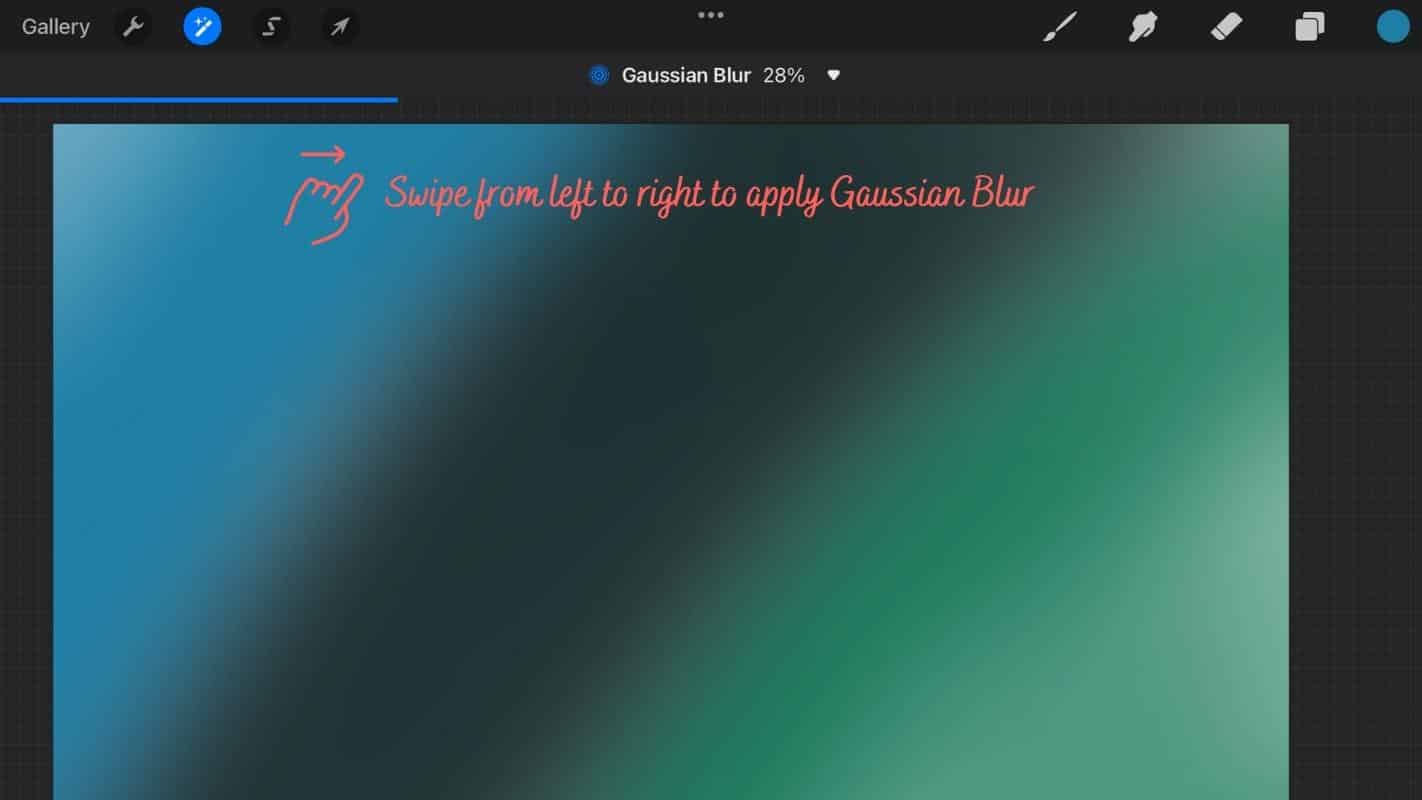
That’s all. You’ve created a gradient using brushes!
Don’t worry if you’re having trouble making a gradient with the Procreate brushes that are already installed. Instead, try one of the Procreate gradient brushes designed specifically for making gradients. We’ve written an article about the best Procreate gradient brushes available:
Suggested Reading: 5 Best Gradient Brushes For Procreate (+Free Brushes)
How To Add Gradient To A Shape
Once you’ve created your gradient in layers, there are only a few steps left to add this gradient to your shape. It’s quick and straightforward, and we have an article on how to do it. Go to the following link to read the article:
Suggested Reading: How To Fill In Procreate – Solid Colors & Gradients
Procreate Gradient Map
After you’ve created your gradient, you can make changes to it at any time. The gradient map is a powerful feature in this app that I believe will be game-changing for many artists. The gradient map enables you to make changes to an existing gradient in a matter of seconds. You can even save and reuse these settings.
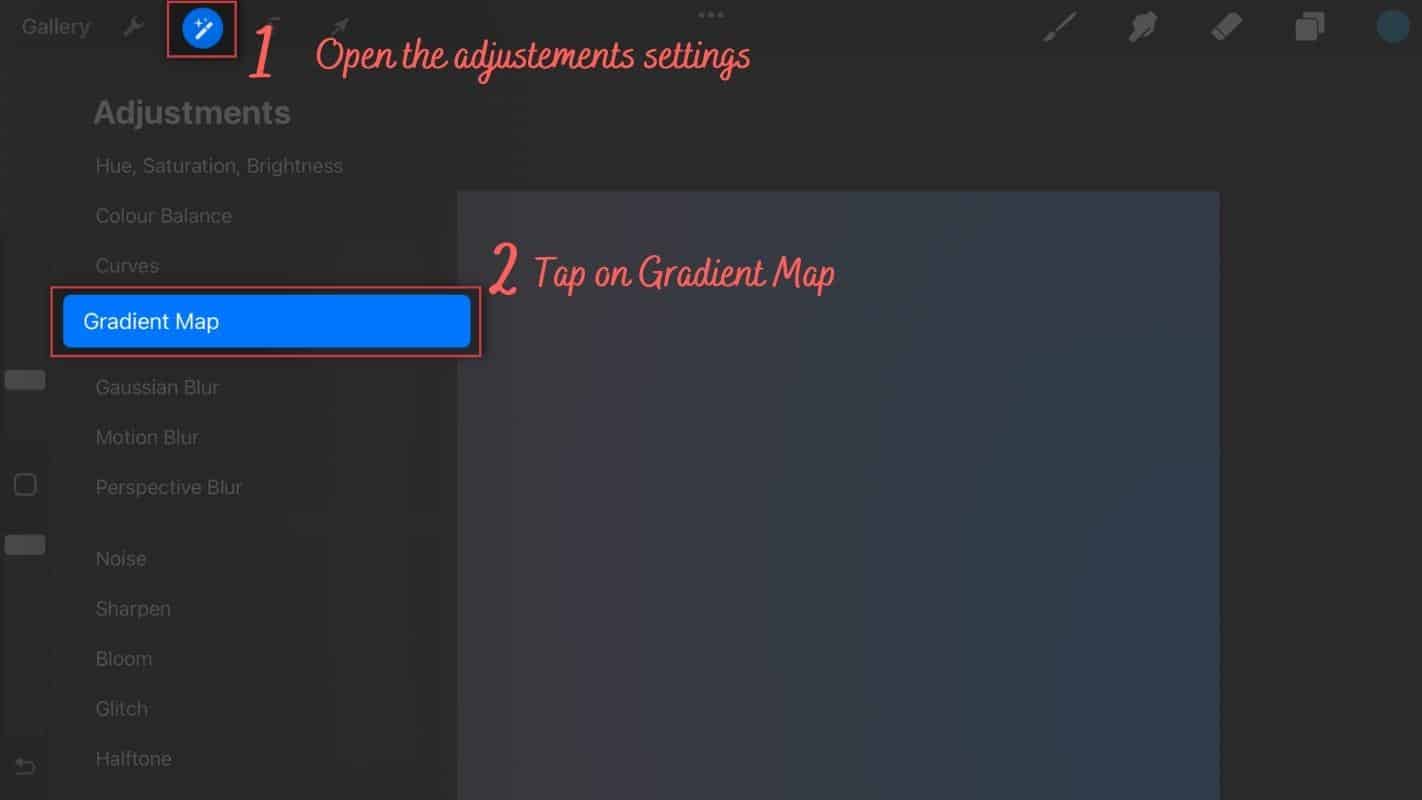
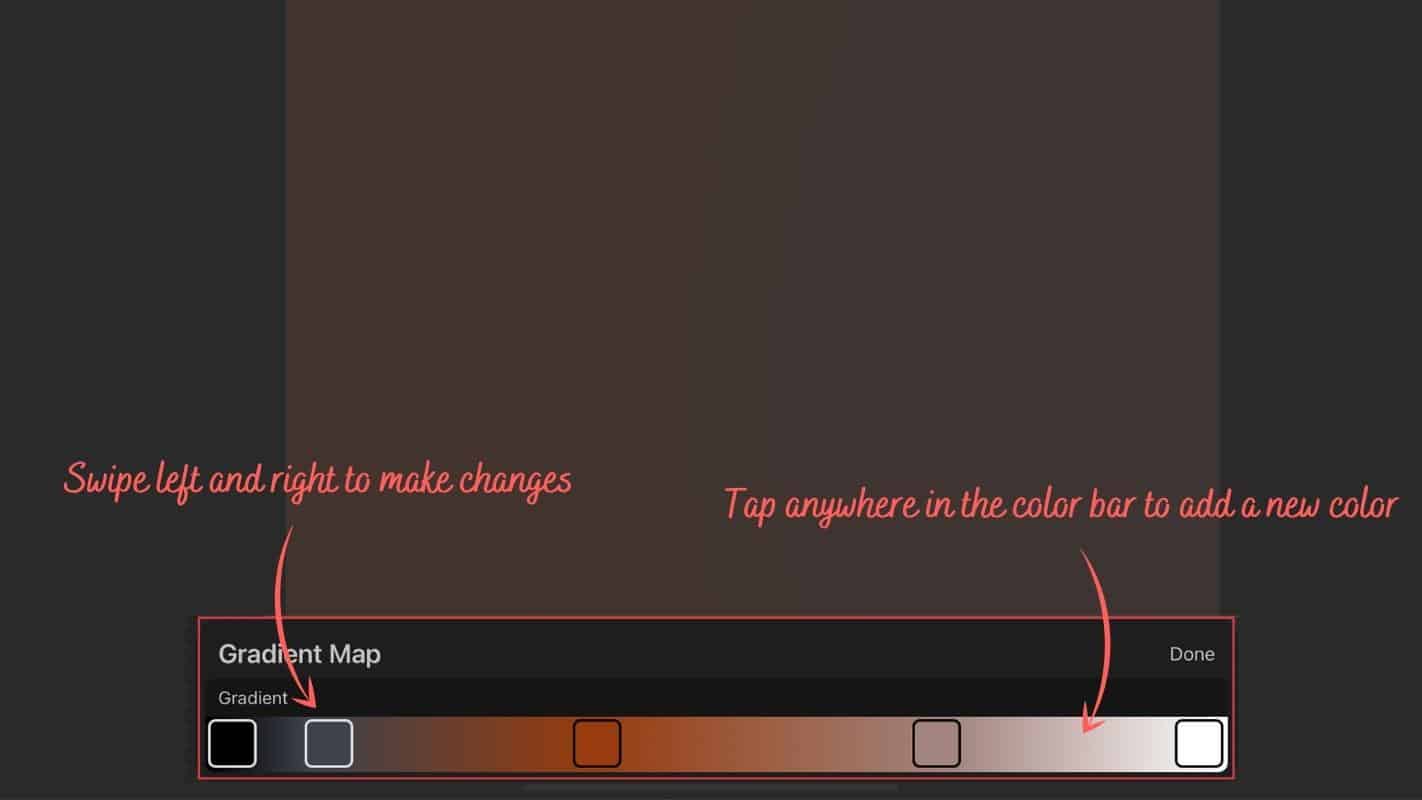
You must have an active gradient on the layer you are currently working on. Then, click the icon with the magic pencil to access the adjustment settings. Then select “Gradient Map.”
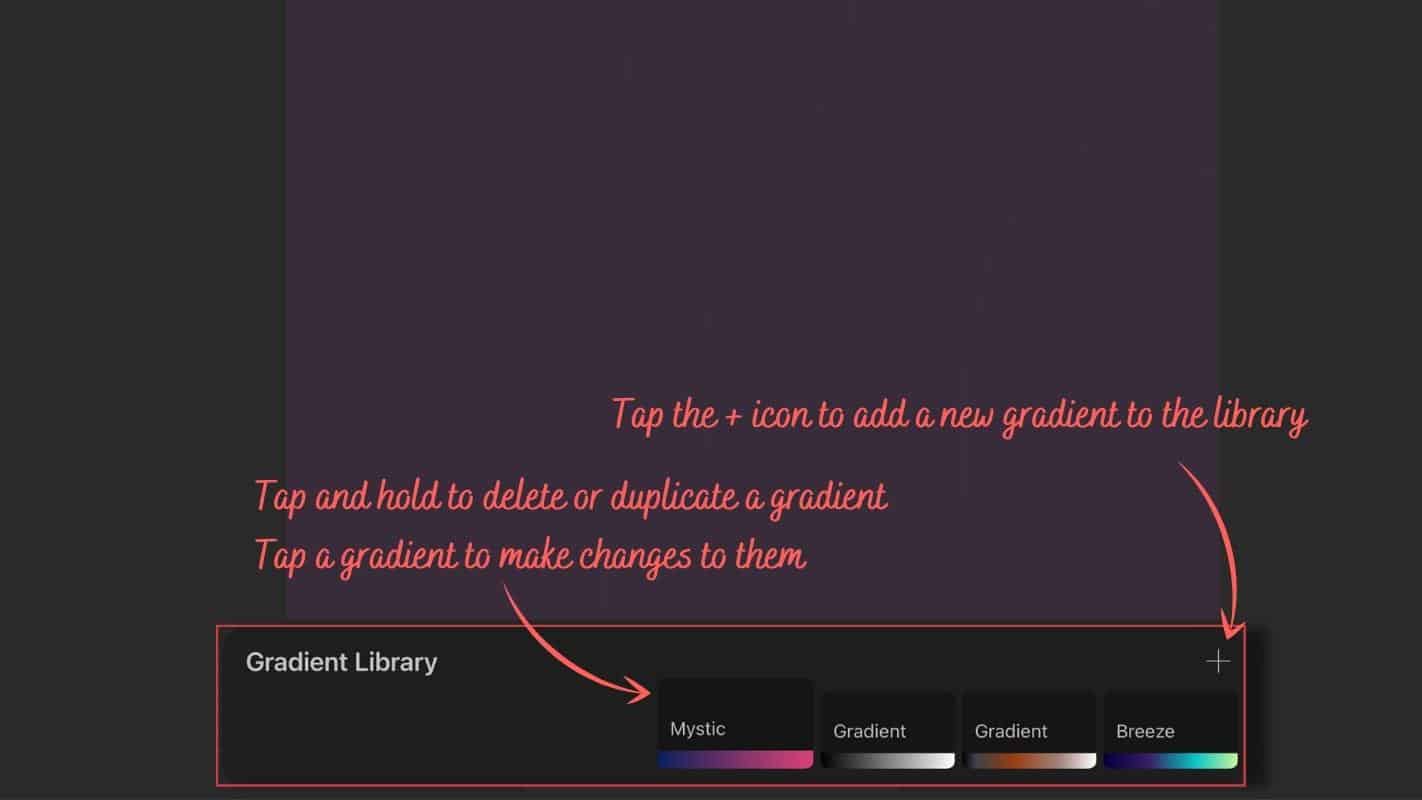
By clicking on the + icon in the top right, you can create a custom gradient palette. Holding down on any of the gradients will allow you to delete or duplicate it.
To make changes to a gradient, tap it. A new window appears with the colors from your gradient. Tap anywhere on the color bar to add a new color to your gradient.
Most Beautiful Gradients For You
So, what if you want to buy some gradients rather than make them yourself? There are color experts out there who have created some of the most stunning gradients we’ve ever seen. We’ve gathered a few of them here. So, take one of these gradients and have fun with it. Alternatively, you can use them as inspiration to create your own gradients.
Procreate Gradient 1
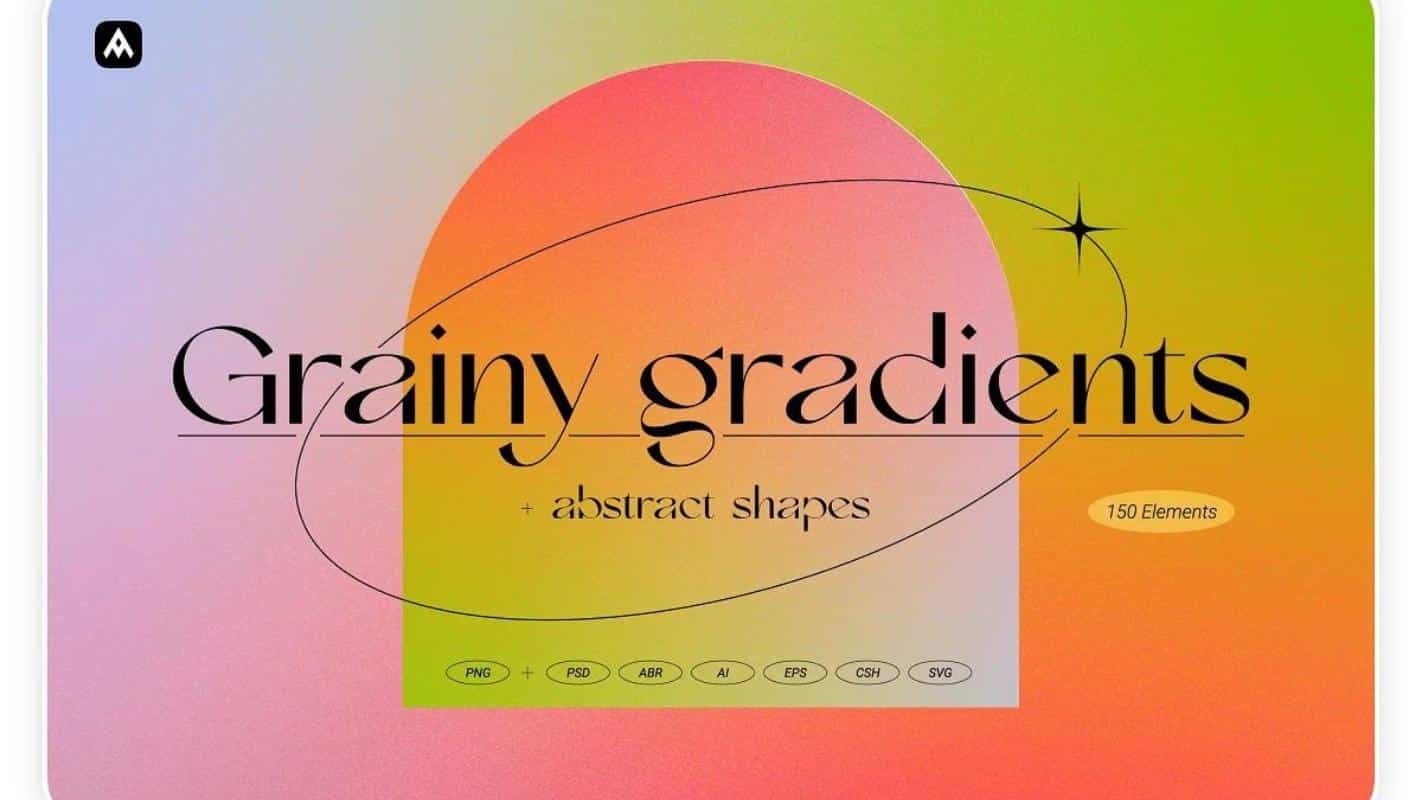
Discover Grainy gradients collection, a surreal mixture of blurry colorful backgrounds, artistic textures, and minimalistic symbols. It comes packed with 72 ready-to-use abstract vector shapes and 78 vibrant artistic backgrounds with the perfect amount of grain texture.
Procreate Gradient 2
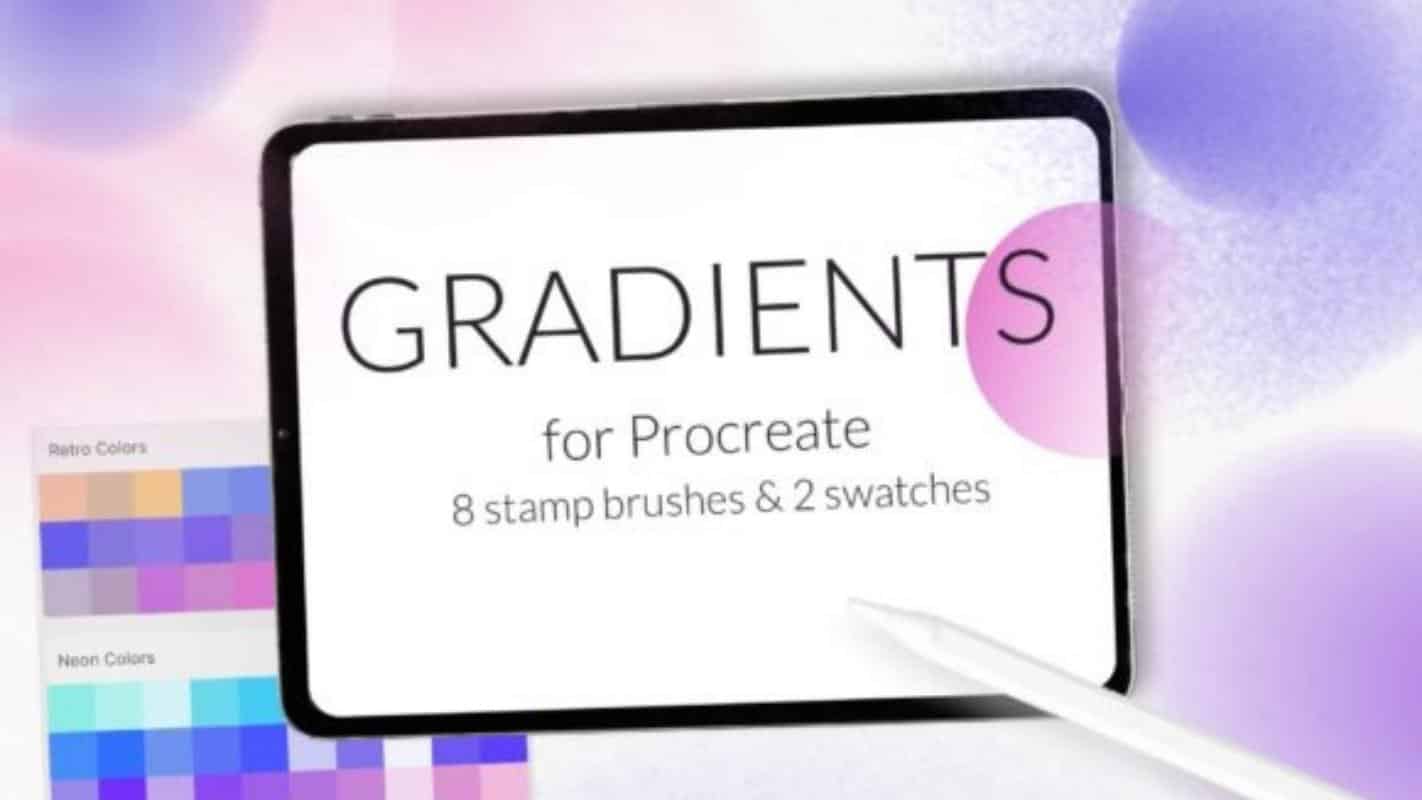
Gradient stamp shapes and retro neon color palette for Procreate included:• 8 gradient forms stamp brushes in 1 brushset• 2 color palette with neon and retro colors
Procreate Gradient 3
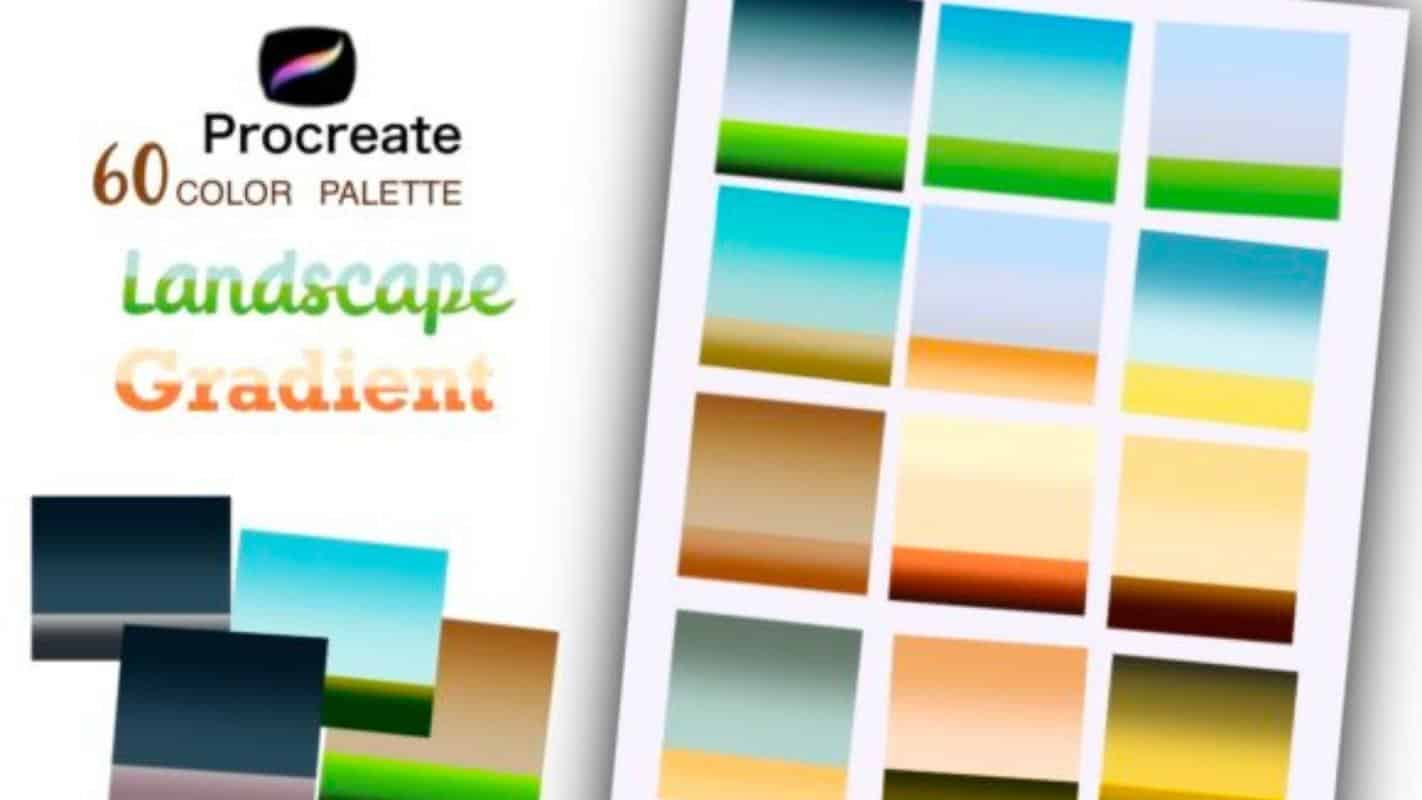
The inspiration of these colors from travel magazines. You can make your artwork look more fabulous by using these elements to be a part of your success. It comes with 60 Procreate gradients.
More Procreate Tutorials
If you’re seeking to expand your digital art skills further, our central tutorial hub is the perfect destination. Filled with a variety of guides, our Procreate tutorials page is dedicated to helping artists unlock their creative potential. From the basics of digital painting to advanced techniques, every tutorial is designed to inspire and educate.
Visit our main tutorial page for an extensive range of Procreate knowledge. Whether you’re polishing your skills or starting fresh, we have something for everyone. Join us in exploring the full capabilities of Procreate and elevate your digital art to new heights.
Don’t stop improving your skills in Procreate with these best classes.
So, that’s it! You know everything now about how to make a Procreate gradient. Thanks for reading,
Lilly-Mai
More Procreate Tutorials:
Sources:
Share with your Friends:


