How To Blend In Procreate (+ Tips To Improve Your Skills)
I’m going to show you how to blend in Procreate. Blending is the process of combining two or more colors to create a new color in Procreate. A blend, also known as a gradient, is the result of blending two or more colors.
Many artists believe that only advanced/high-end drawing tablets can achieve color balance and blending. This is not correct! Combining colors on an iPad is also possible with enough practice, the right tools, and the proper method.
We’ll show you how to mix colors on Procreate in this tutorial. This tutorial on how to blend in Procreate is suitable for beginners and more advanced digital artists. However, if you’re just getting started or want to refresh some of your workflows, you’ve come to the right place.
There are numerous approaches on how to blend on Procreate. Because different blending effects can be used to achieve the same result, feel free to play around with these tools until you find a method that works for you.
We begin with the most common and best blend modes – blending in Procreate with blending brushes. Following that, we demonstrate another method using a Gaussian blur. Finally, let’s get started with this Procreate tutorial on how to smudge.
How To Blend In Procreate – With Blender Brushes
Blender brushes are Procreate brushes specifically designed to aid in the mixing of colors in Procreate. Blender brushes are typically colorless because they combine the colors of the background colors. This makes it simple to create truly unique colors and smooth and professional transitions and blends on your iPad.
Blending brushes enable you to blend colors more realistically than standard Procreate brush strokes. Blender brushes produce results similar to traditional media such as paint and pastel. Blender brushes are specifically designed for the blending of colors on an iPad, so they perform better than anything else on the market right now.
1. Download Some Blender Brushes
We recommend using blender brushes for the best results. They’re designed for blending, so you’ll get great results every time. There are also free blending brushes to choose from. If you want to learn more about the best blending brushes, check out this article:
Procreate Blender Brushes: 13 Best Procreate Blending Brushes (+Free Blending Brushes)
Let’s get started with the blending tool in Procreate. If you don’t want to install extra brushes, you can experiment with a soft watercolor brush. They are already installed by default on Procreate. However, keep in mind that the results are not as good as when using specially designed blender brushes.
Blending brushes are also known as smudge colors or smudging brushes. Although they are not precisely identical, both of these expressions can be used in this context to describe how to smudge in Procreate or how to blend colors in Procreate.
2. Merge Everything Into One Layer
Make sure all objects and colors you want to blend are in the same layer. Blending does not work on different layers using the smudge tool if they are on separate layers. To accomplish this:
- Open the layer settings on the top right
- Click on the layer you want to merge
- Press “Merge Down”
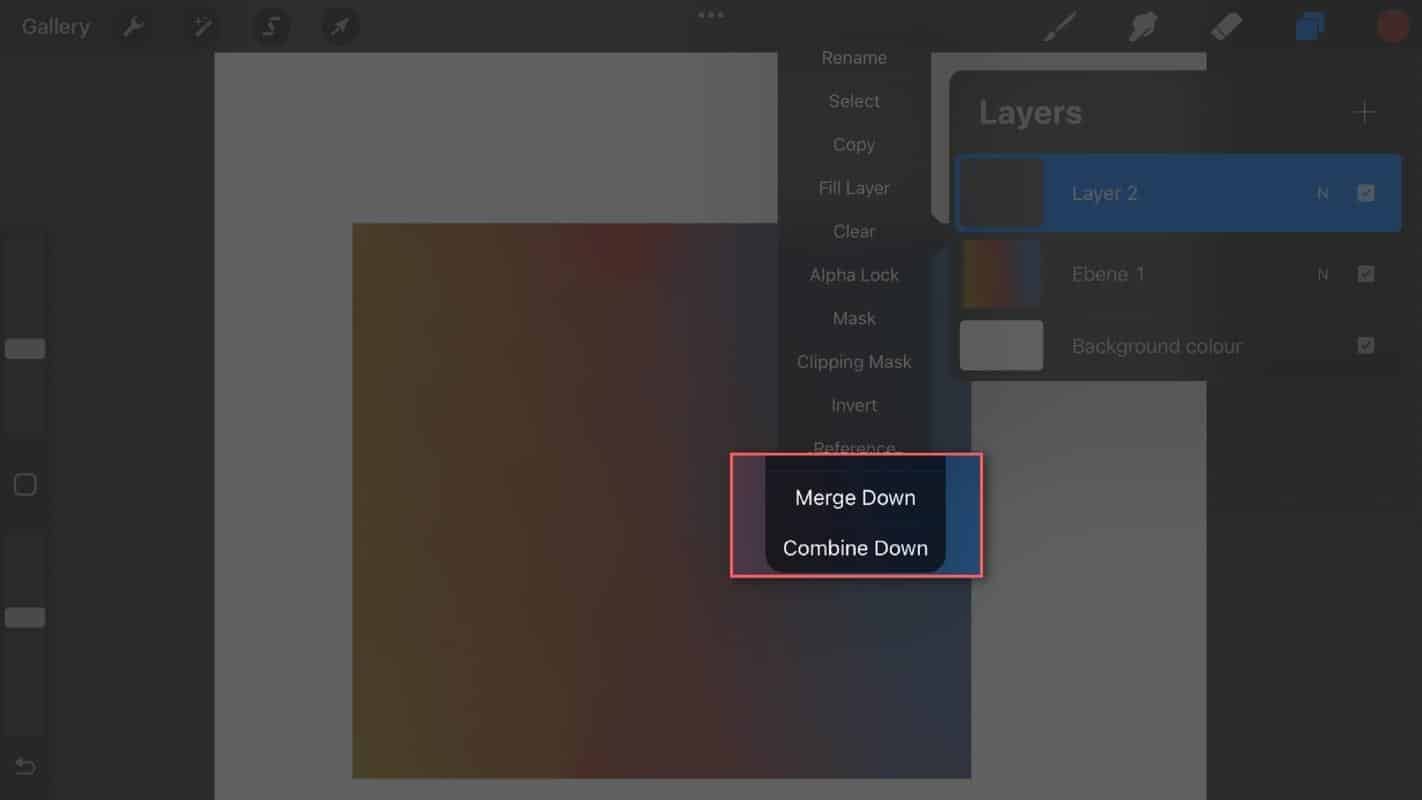
It combines with the layer below to form one. If you have multiple layers, repeat this process. Alternatively, press “Combine Down” and then “Flatten” the combined layers to create a single layer that contains all of the sublayers.
3. Activate Alpha Lock
The Alpha Lock. Even if you don’t need it all the time, you need it most of the time when using the smudge tool. How to Enable Alpha Lock:
- Click the layer options on the top right
- Select the layer you want to active Alpha Lock
- Click Alpha Lock, make sure the Alpha Lock is checked
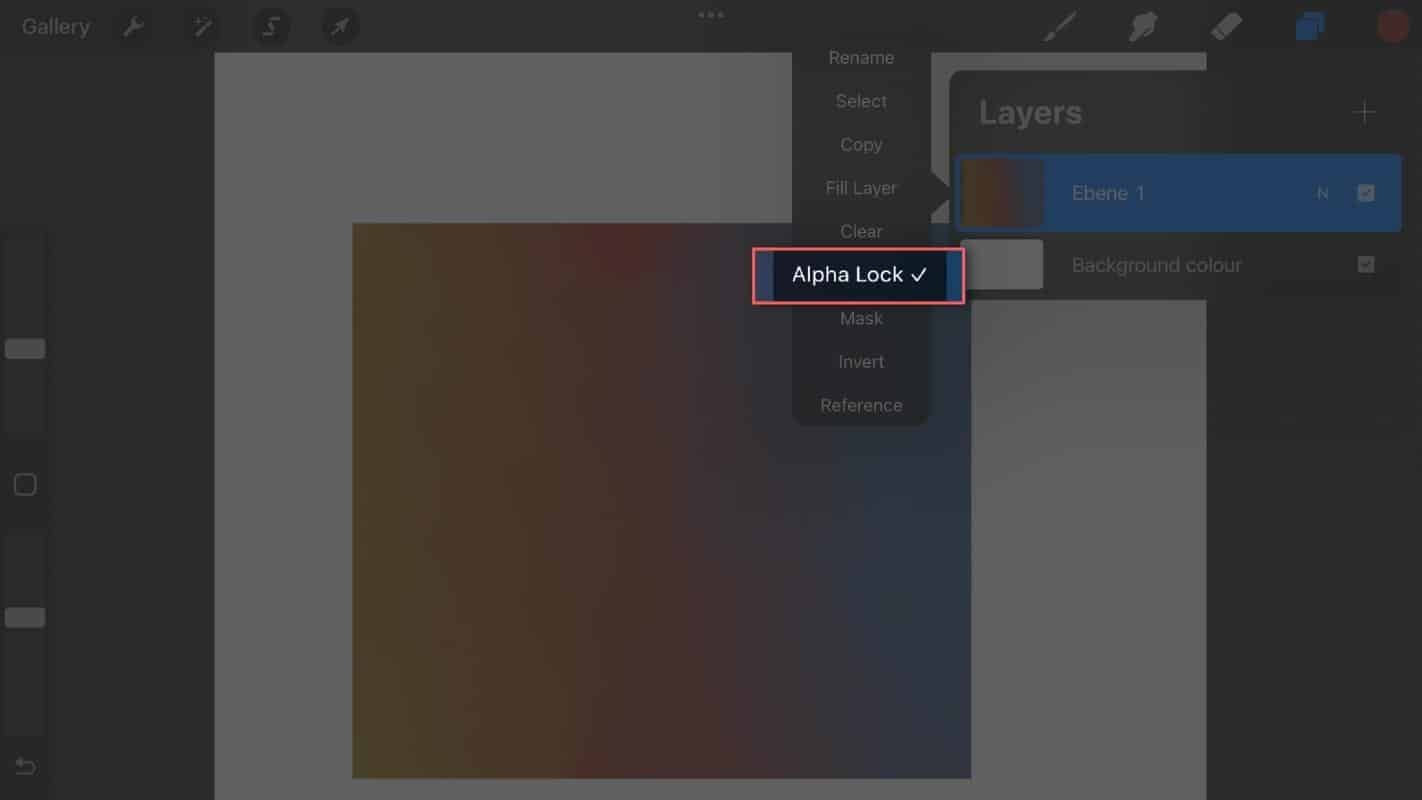
Alpha Lock is a Procreate function that locks the transparency of a layer so that you can’t draw outside of it. This is useful when blending colors because it prevents you from drawing outside of the area you want to blend.
So, now that you’ve merged the layer you want to blend, activated the Alpha Lock on the desired layer, and have some friendly and professional blending brushes in your library, let’s move on to how to mix colors in Procreate.
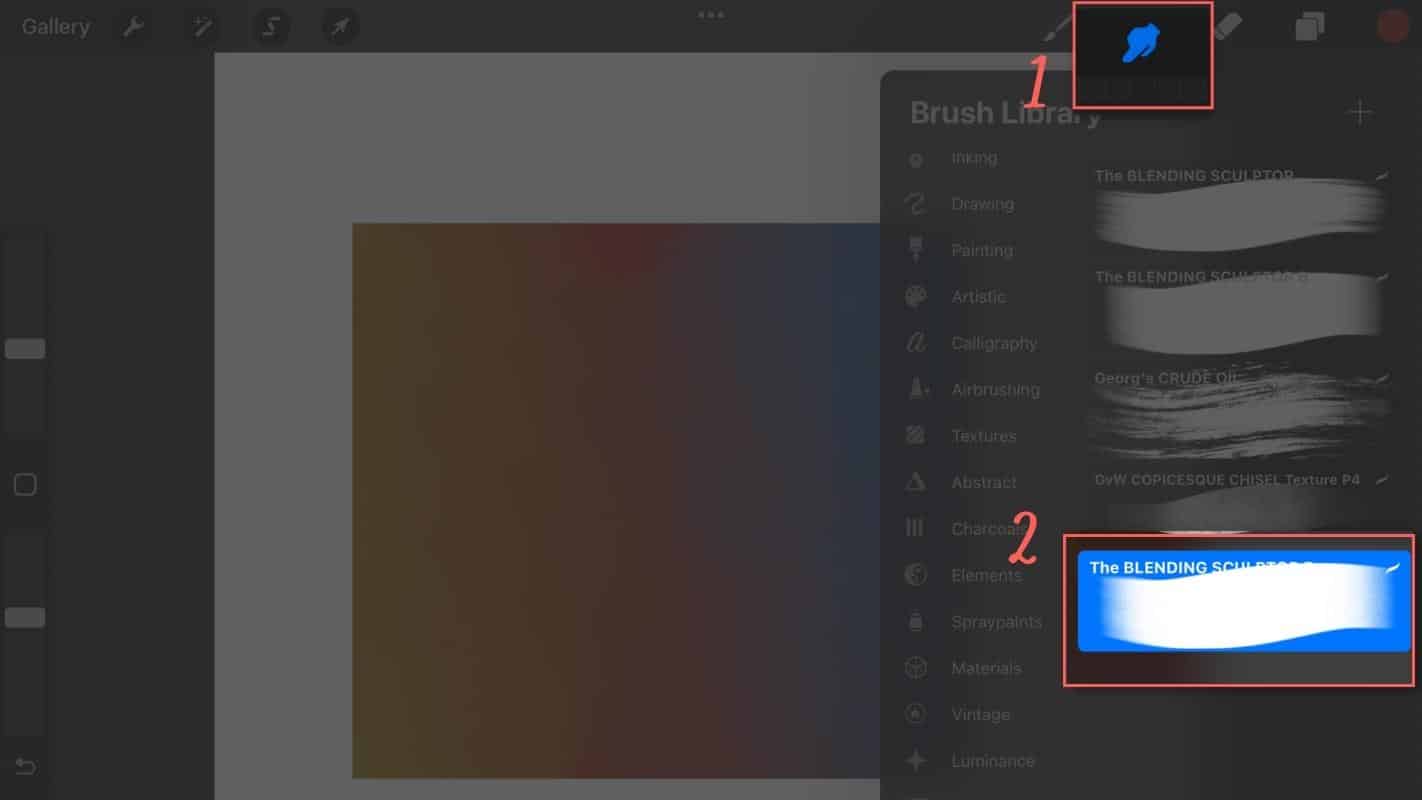
4. Select Smudge Tool
Where is the smudge tool in Procreate? You find this tool on the top bar. The smudge tool is the hand symbol. Then, choose the blending brush you want to use.
5. Adjust Opacity
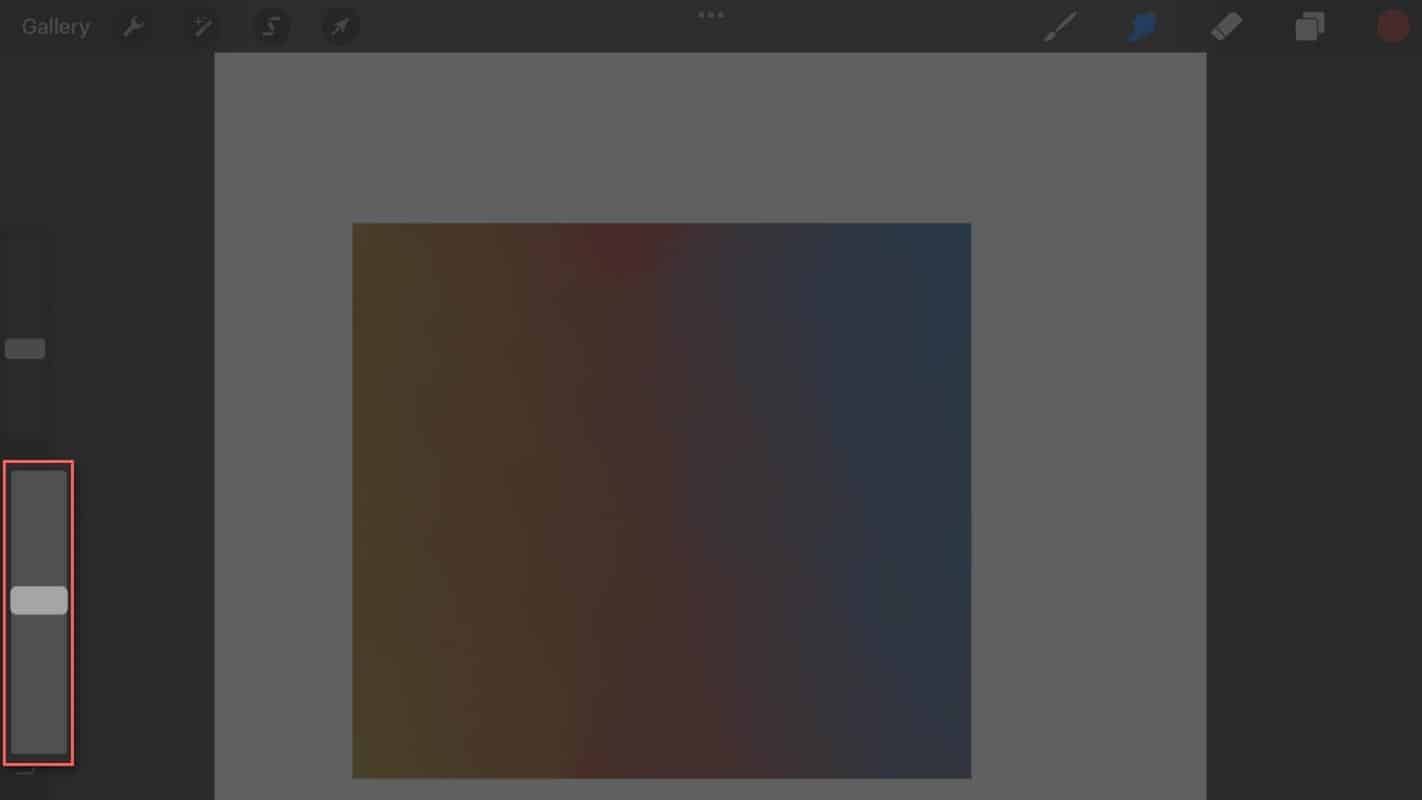
When blending in Procreate, we got the best results when setting the brush’s opacity to about 50% to 60%. These figures, however, are not set in stone. However, try a range between these two numbers if you’re just getting started.
6. Go Softly
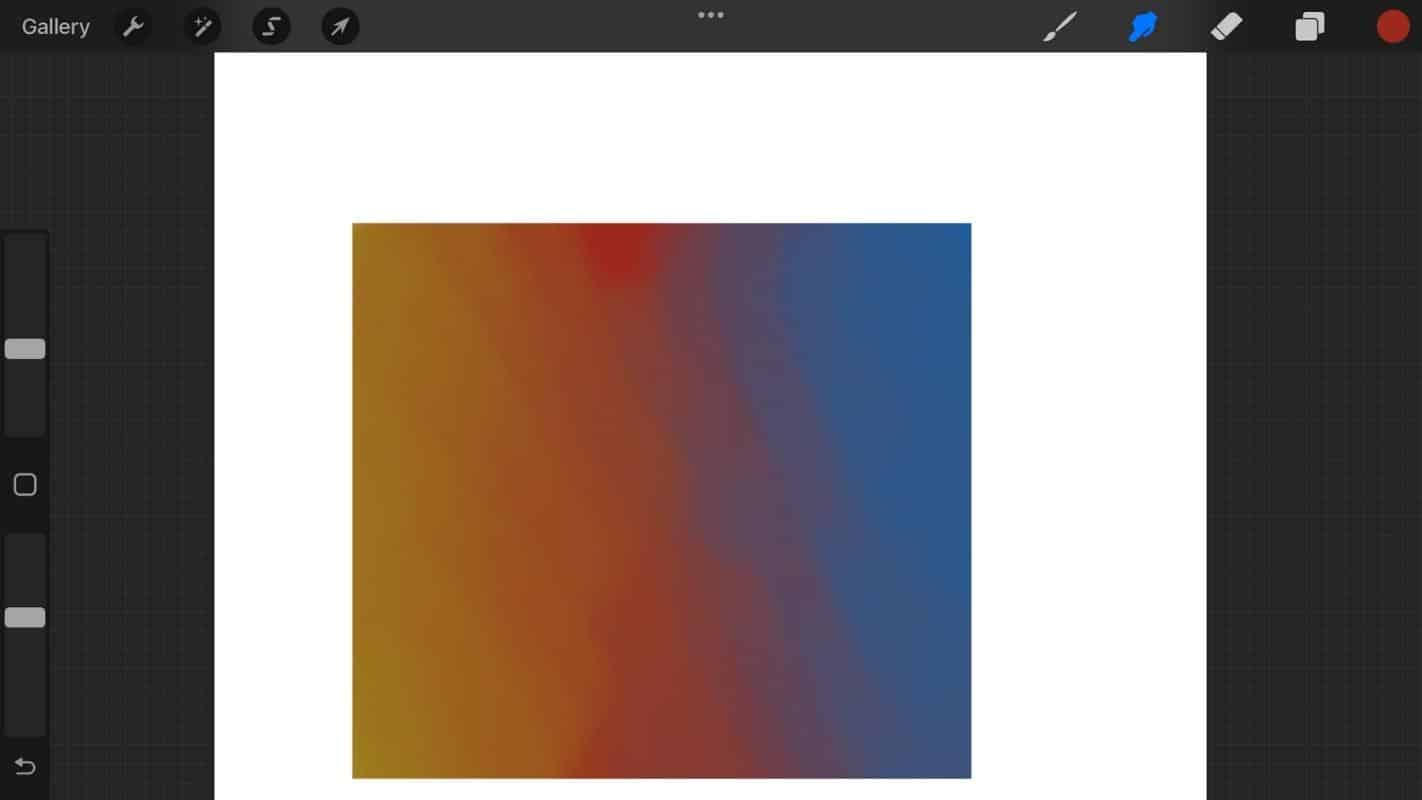
When you blend on Procreate, it should be done gently. It doesn’t work if you push too hard. Instead, use light pressure and soft strokes. As a result, the colors blend into one another and create a lovely effect.
7. Practice Makes Perfect
If you want good results, blending takes time and patience. So, it’s critical to move slowly and take your time. This will help to ensure that you don’t mix the colors incorrectly and have to start over. How to blend in Procreate is an art form. And you get better at it by doing it. So, get out there and start experimenting with different combinations!
8. Select Blending Brush Color
Using a blending brush makes no difference in which color you choose. Generally, blending brushes are colorless. Therefore, you can mix colors without selecting the color you want to mix.
How To Blend On Procreate – With Gaussian Blur
Gaussian blur is a type of blur used to make images appear more realistic. It’s frequently used to add the finishing touches to an image. It is a little more difficult to achieve than a standard blur. It can, however, be extremely useful in creating realistic-looking images. The built-in Gaussian Blur functionality in Procreate makes this type of blurring simple.
Color blending with a gaussian blur is less complicated and faster. The disadvantage is that you can only use this method in Procreate for more basic blending work. It cannot be used for all types of blending.
It is helpful for basic blendings, such as creating a color gradient or adding more color to an object. However, it cannot perform advanced functions such as feathering or incorporating shapes, strokes, and shadows into your blend. This is how to blend with Gaussian blur in Procreate.
1. Open Adjustments
Go to “Adjustments,” which is the Pencil in the upper left corner with the two glitters next to it.
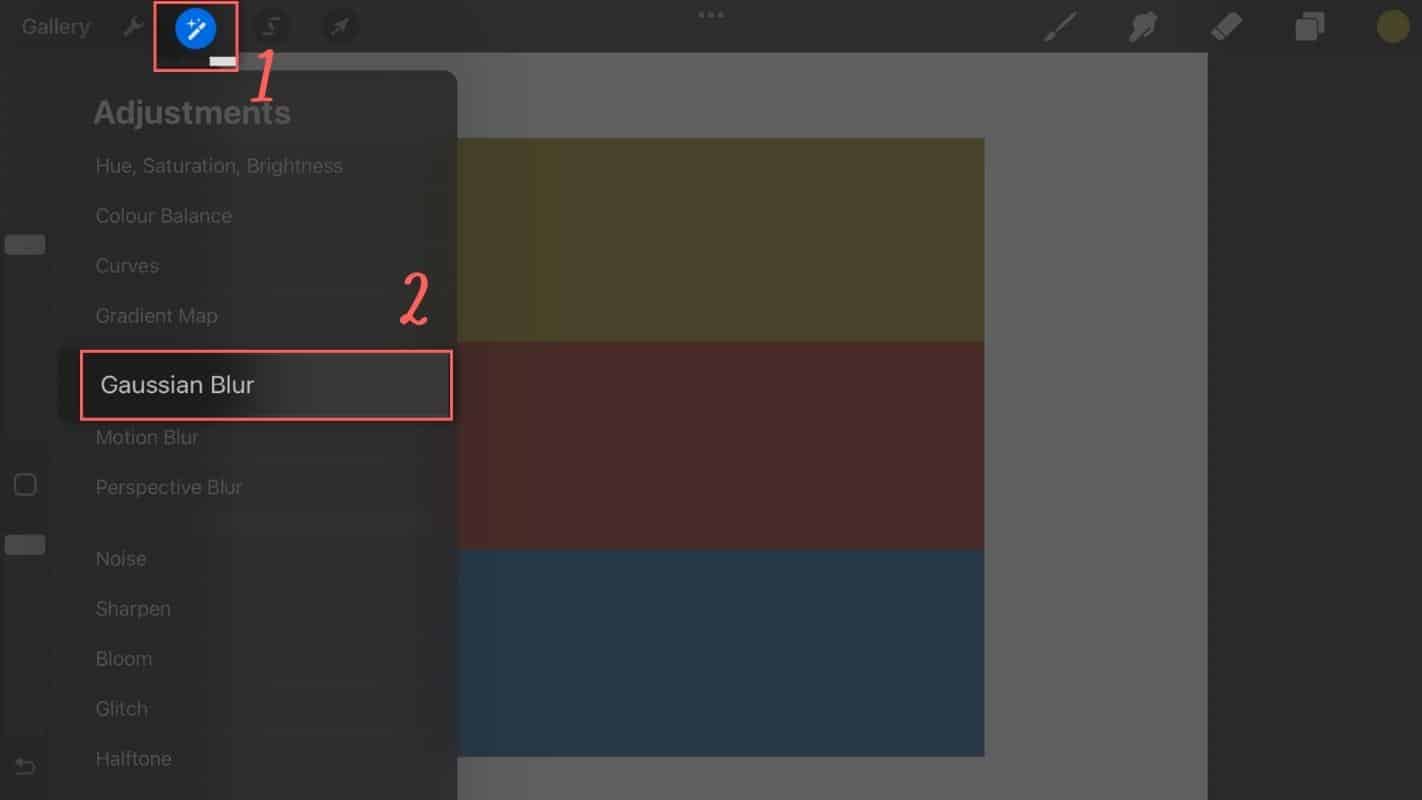
2. Select Gaussian Blur
In the options menu, choose Gaussian Blur.
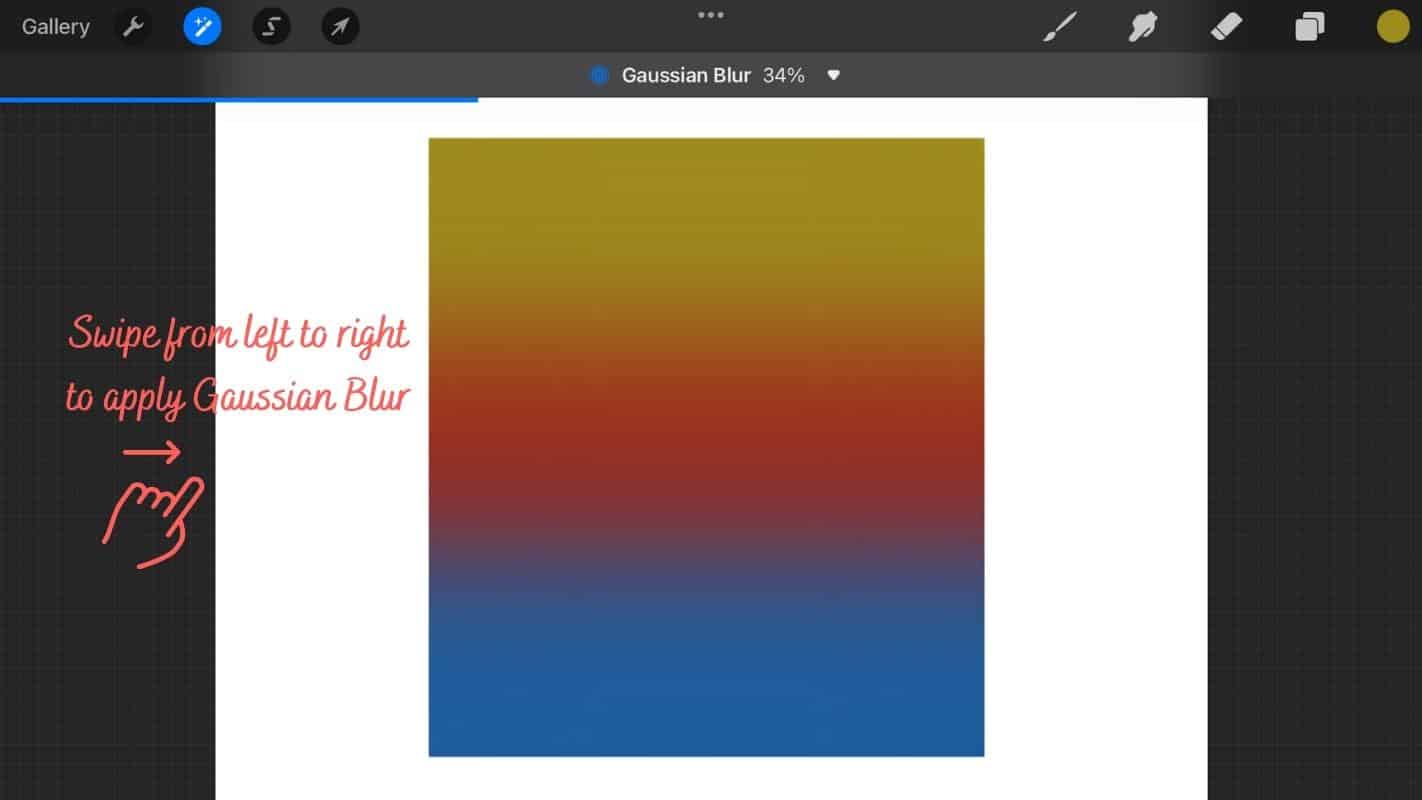
3. Add The Gaussian Blur
To add the gaussian blur to your layer, draw slowly from left to right with your Apple pencil. On top, you have a bar that indicates how much Gaussian blur is applied. The Gaussian blur tool can create beautiful gradients and seamless blending. Still, as previously stated, it has some limitations.
How To Blend Skin In Procreate
Drawing characters and creating realistic skins is one of the most sought-after skills in digital art design. The process of blending skin in Procreate is the same as, for example, creating a polished and appealing apple.
However, there are numerous factors to consider when creating perfect skin. The skin’s structure, the colors, and how those colors interact with one another. It’s much more challenging to blend with than anything else.
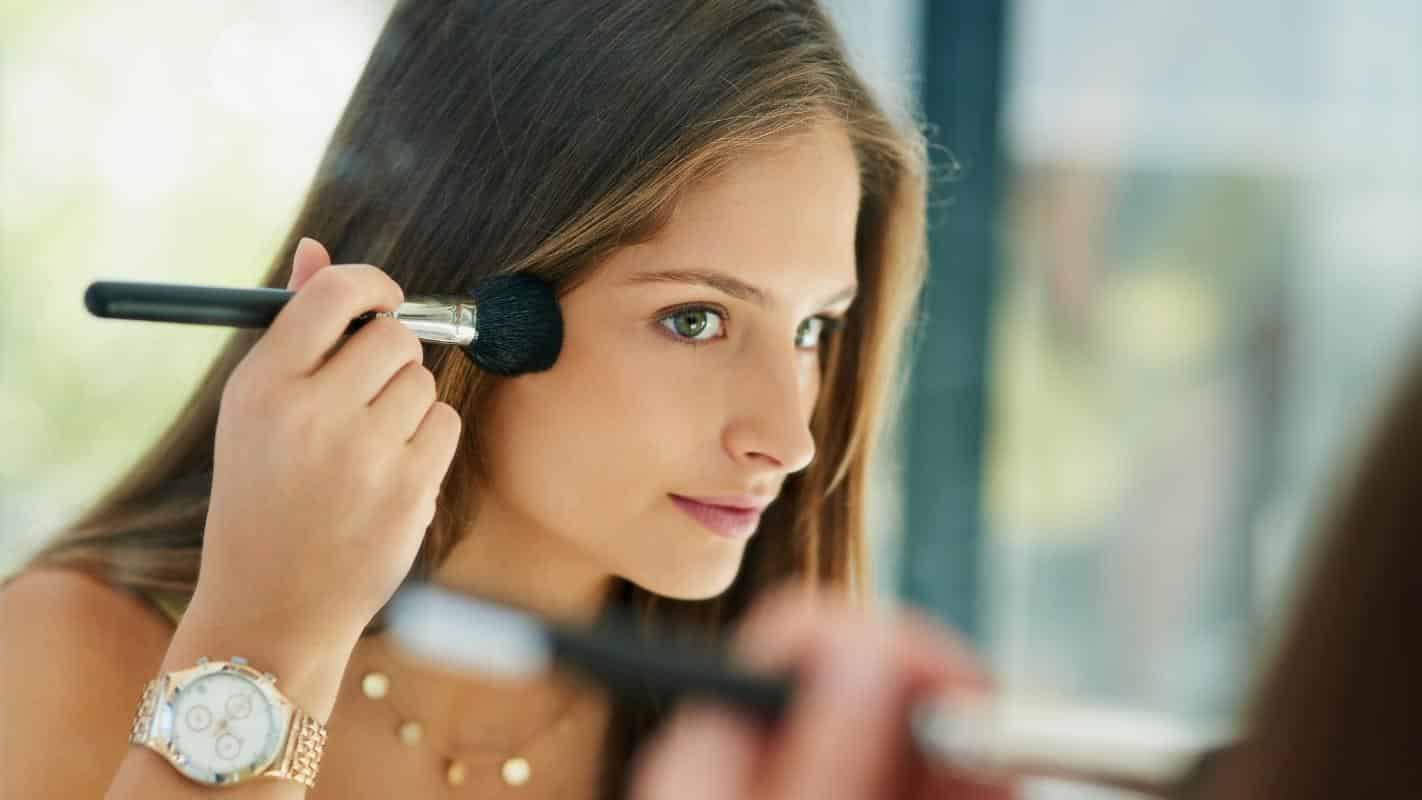
For Procreate, we recommend using a really good skin color palette. This is covered in more detail in this article below. However, if you’re just getting started, there are some free skin color palettes available as well.
Suggested Reading: 7 Best Skin Tone Palettes For Procreate (+Free Skin Palettes)
We also recommend using a blender brush to blend the skin rather than soft watercolor brushes. Because it is more difficult. Also, set aside some time to practice skin blending in addition to your other tasks.
However, once you’ve mastered it, you’ll be able to achieve flawless skin in no time. Blending skins with Procreate is seriously a lot of fun. And as a digital artist, this skill is extremely valuable!
How To Blend In Procreate Pocket
As the pocket version of Procreate becomes more popular, this question arises more frequently. The procedure for how to blend in Procreate Pocket is the same as it is for blending on an iPad. Simply follow the steps outlined in the article, and you’ll be a digital art master on your iPhone master in no time!
More Procreate Tutorials
Have you been enjoying our deep dive into Procreate’s specific features? There’s so much more to explore! For a comprehensive journey through the myriad of possibilities Procreate offers, visit our main page, where we collate all our knowledge and insights. Whether you’re a beginner or an advanced user, our Procreate tutorials provide a wealth of information to enhance your digital art journey. From foundational skills to advanced techniques, we cover it all.
Our main tutorial page is a treasure trove of knowledge, designed to cater to artists of all skill levels. Dive into detailed guides, discover hidden features, and learn tips and tricks that can transform your digital art experience. Don’t miss out on the full spectrum of what Procreate has to offer!
Wrapping It Up
This article taught you how to blend with a Gaussian blur in Procreate. You’ve learned how to blend colors or how to blend pictures on Procreate in various ways and how to use the Gaussian blur tool. You are also aware of the tool’s limitations. You’ve also learned how to blend skin in Procreate and some tips for doing so.
Blending is an essential part of your digital art design work. If you’re just starting out, it’s best to practice blending on simple objects of various colors and shapes. This will help you improve your blending skills in general, not just with Procreate. Give this skill some time and effort to master. You’ll get there, and you’ll never stop using this skill when creating digital art.
Once you’ve mastered this skill, all types of work become a lot easier and more enjoyable. Learning how to blend in Procreate is an essential component of digital art education!
So, that’s it on how to blend in Procreate. Happy blending! And thanks for reading,
Lilly-Mai
More Procreate Tutorials:
Sources:
- How To Blend In Procreate – Tips & Tricks 1
- How To Blend In Procreate – Tips & Tricks 2
- How To Blend In Procreate – Tips & Tricks 3

